This guide gets your environment ready quickly so class time can focus on programming, not setup troubleshooting.
Setup Checklist
- confirm whether your device is Windows or macOS
- download Thonny from thonny.org
- install with default options
- open Thonny and verify the editor + shell are visible
- run a one-line test program:
print("Thonny is working!")
If Setup Is Blocked
- capture the exact error message
- note your device type and what step failed
- send that information through your normal support process
Related Pages
🐍
Get Python Ready:
Install Thonny
Year 9 Digital Technologies • Windows & Mac • 10–30 minutes
✅ Setup Guide
🐍
This page gets you set up with Thonny, a beginner-friendly Python coding app. When you're done, you’ll run a one-line program to prove your setup works.
Tip: each section below is a collapsible card. Click the heading to open/close.
✅ Why are we using Thonny? ›
Thonny is a free Python editor designed for beginners. It’s simple, it runs code easily, and it helps you learn without a million distractions.
Good news: Thonny usually includes Python already, so you don’t need to install Python separately (most of the time).
In class you’ll use Thonny to: write Python, run programs, test ideas, and learn good coding habits.
🧩 Before you start ›
Quick checklist
- You know whether your computer is Windows or Mac.
- You have internet access.
- You are allowed to install apps (or you know who to ask if installs are blocked).
School laptop? If you get an “admin required” or “blocked” message, skip ahead to
Troubleshooting.
🪟 Windows install (step-by-step) ›
1
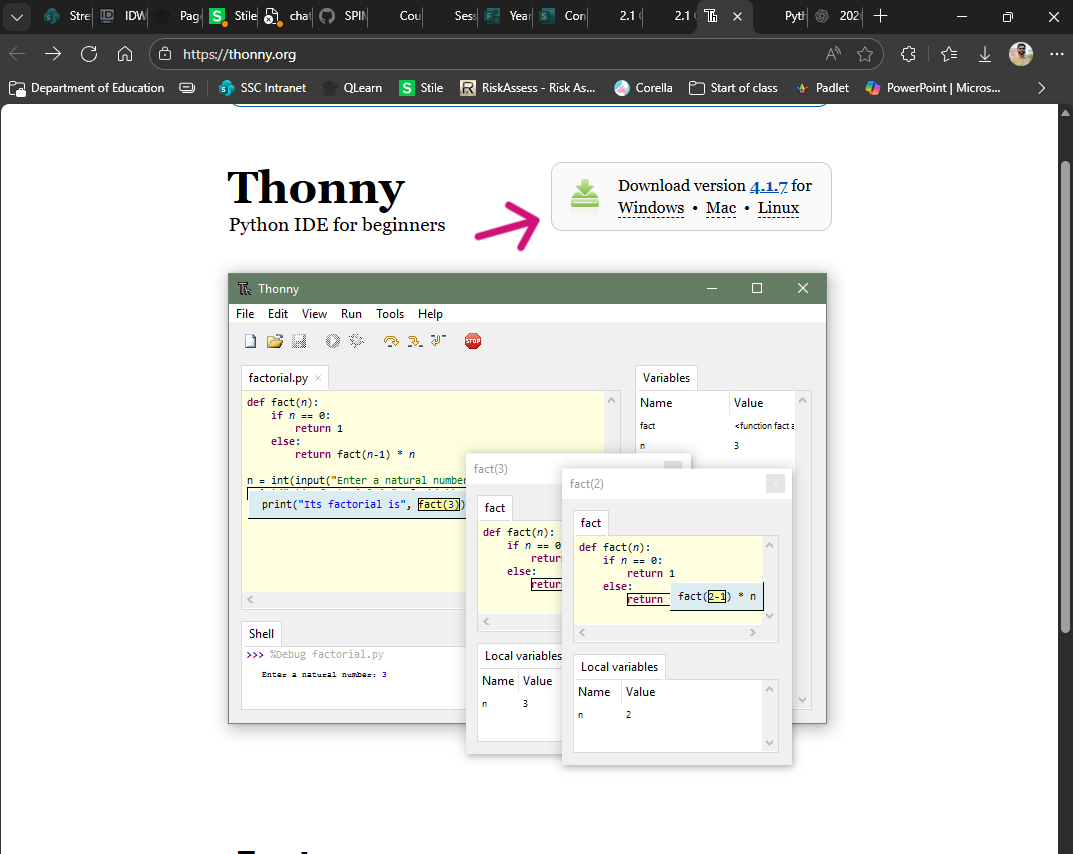
If you are at home: Download Thonny from the official website or
Click on the link for the Windows download and choose the latest version (usually the first option).
If you are at school: Download Thonny from the link here
What you should see: a file ending in .exe (example: thonny-x.x.x.exe) in Downloads.
Windows: Download Thonny from the official site (thonny.org).
2
Run the installer
Open Downloads and double-click the .exe file you just downloaded.
If Windows warns you: confirm you downloaded from thonny.org, then choose Run anyway / Keep if prompted.
What you should see: a setup wizard window with a Next button.
Windows: Locate the .exe in Downloads and start the installer.
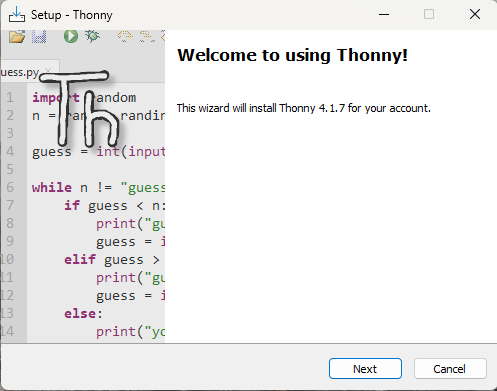
3
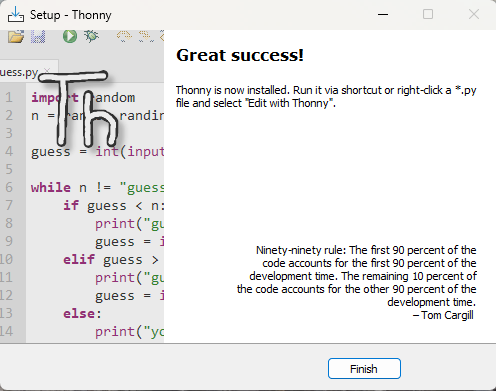
Follow the setup wizard (use defaults)
Click Next through the setup screens. Leave the default options as they are.
What you should see: a final screen that says something like Finish or Installation complete.
Windows: Finish the install (defaults are fine).
4
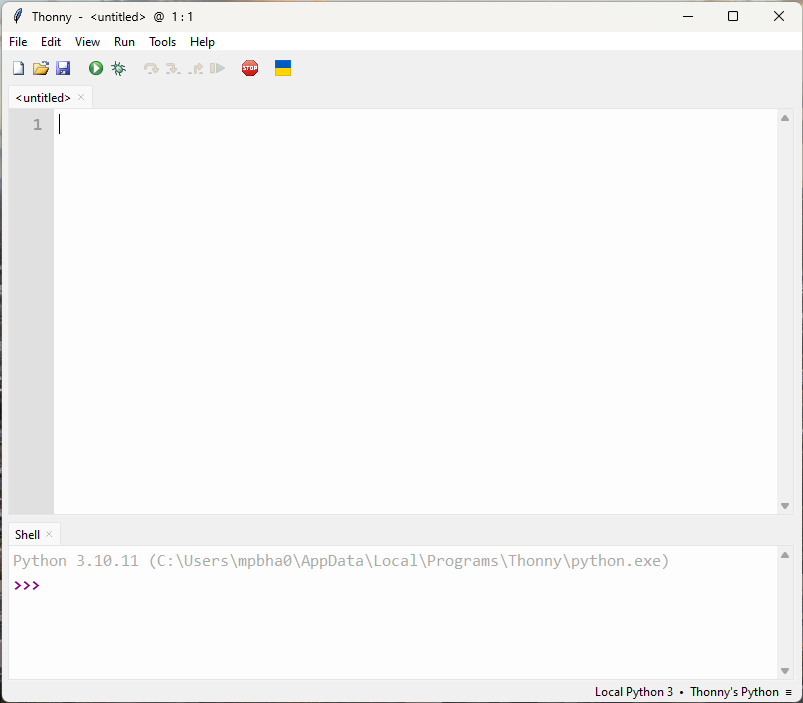
Open Thonny
Open the Start Menu → search Thonny → click to launch it.
What you should see: Thonny opens with an Editor (top) and a Shell (bottom).
Windows: Find and open Thonny.
🍏 macOS install (step-by-step) ›
1
Download Thonny from the official website
If you are at school: Download Thonny from the link here.
What you should see: a file ending in .pkg in your downloads folder
![Mac: Thonny website showing the macOS download link.]()
Mac: Download Thonny from the official site (thonny.org).
2
Open the installer package
Open the .pkg file and follow the prompts (Continue → Agree → Install).
What you should see: a message saying installation was successful.
![Mac: Thonny pkg installer screen.]()
Mac: Run the Thonny installer.
3
Open Thonny from Applications
Go to Applications and open Thonny.
macOS security message? If it blocks Thonny the first time, try: right-click Thonny → Open → Open (only if downloaded from thonny.org).
What you should see: Thonny opens with an editor (top) and a Shell (bottom).
![Mac: Applications folder showing Thonny, or macOS security prompt.]()
Mac: Open Thonny (and allow it if macOS asks).
🚀 First launch checklist + test ›
Your goal: open Thonny and run one line of Python to prove it’s working.
What you should see in Thonny
- Editor (top): where you type code
- Shell (bottom): where output appears
- A Run button (often a green play icon)
Thonny layout: Editor (top) + Shell (bottom).
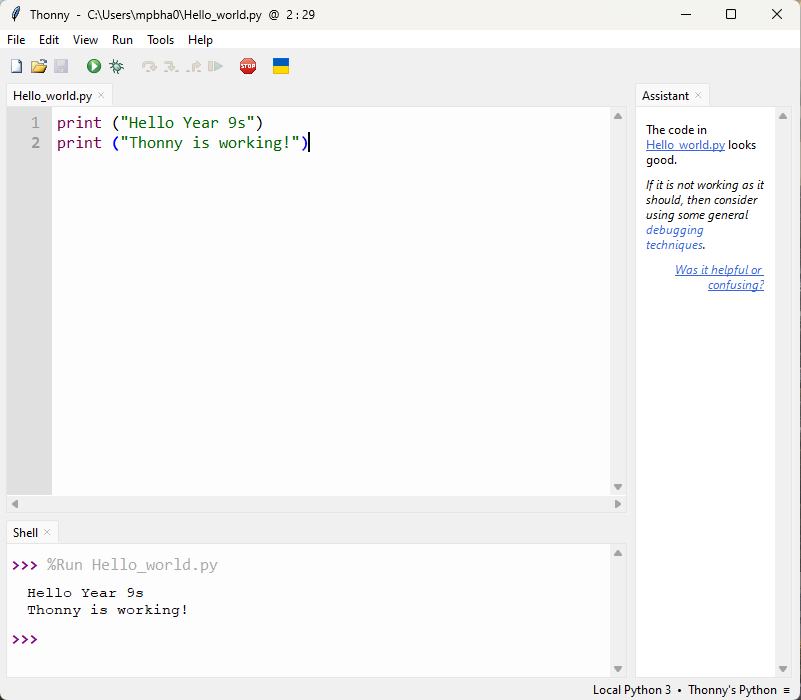
Run the test code
Copy this into the editor, then click Run.
print("Thonny is working!")
Expected output (in the Shell): Thonny is working!
Test complete: output appears in the Shell.
🧯 Troubleshooting ›
If something goes wrong, don’t panic. Find the closest problem below and follow the steps.
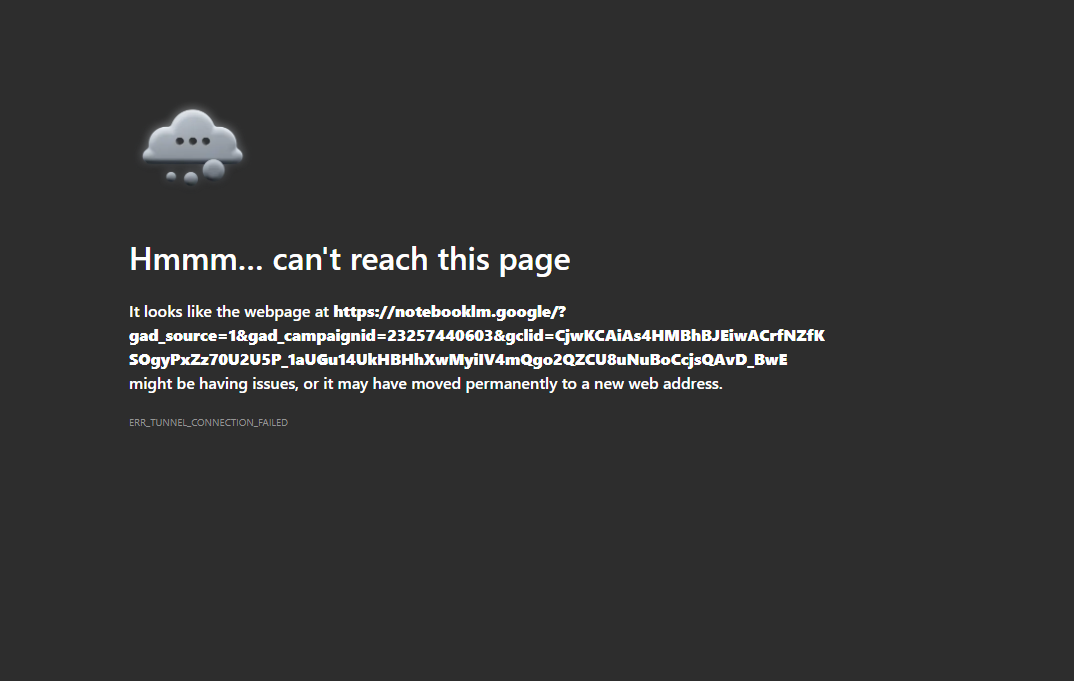
I can’t download Thonny ›
Make sure you are using the official site: https://thonny.org/
If the download won’t start, try a different browser. If you’re on a school network, it may be blocking downloads.
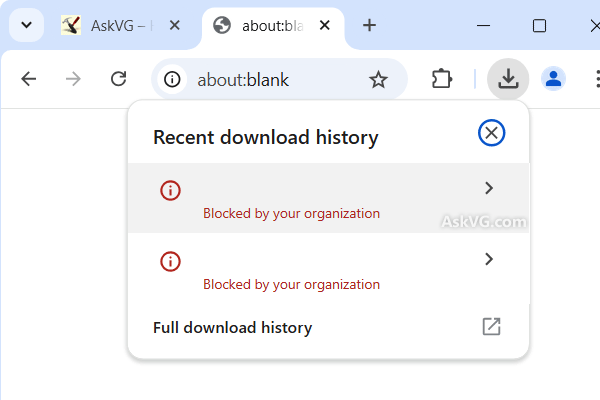
If downloads are blocked, show this message to your teacher.
School device / admin blocked ›
If you see “admin required”, “blocked”, or “you don’t have permission”, you’ll need a teacher/IT to install it.
What to send your teacher: Windows/Mac + a screenshot of the message + what you clicked.
Admin permission required — screenshot this and show your teacher.
Thonny opens, but Run doesn’t work ›
Make sure your code is typed in the Editor (top), not directly into the Shell (bottom).
Then try clicking Run again.
macOS says it can’t verify the developer ›
If you downloaded from thonny.org, try: right-click Thonny → Open → Open.
❓ FAQ ›
Do I need to install Python separately?
Usually no — Thonny normally includes Python.
Can I install Thonny at home?
Yes. Use the same steps on your home computer.
What if I already have Python installed?
Still fine. Thonny can usually manage its own Python setup.
I’m stuck. What do I send my teacher?
Device type (Windows/Mac), what you clicked, and a screenshot of the message.