From Busted Screen to Fully Functional Satellite Radio
Repairing an ID-5100A head unit with replacement touch screen and LCD parts sourced directly from Icom Australia.
Repairing an ID-5100A
I picked up a second-hand Icom ID-5100A cheaply because the head unit screen was busted. The damage was bad enough that the radio only made sense at the right price. In my case, that price was A$350, which put it firmly in the “worth saving” category rather than the “this may be a character-building financial mistake” category.
The useful surprise was not just that the radio was repairable, but how easy it was to get the parts from Icom directly.
That changed the whole job immediately. Once I knew the parts were available and I could buy them without having to hunt down a donor unit from the far side of the internet, this stopped feeling like a gamble and started feeling like a perfectly sensible bit of bench surgery.
And that is exactly what it turned out to be.
A bit of careful disassembly, some adhesive softening, one borrowed hair dryer, and a controlled amount of persuasion later, the busted-screen bargain radio turned back into what I actually wanted in the first place: a fully functional ID-5100A ready for satellite work.
Why This One Was Worth Saving
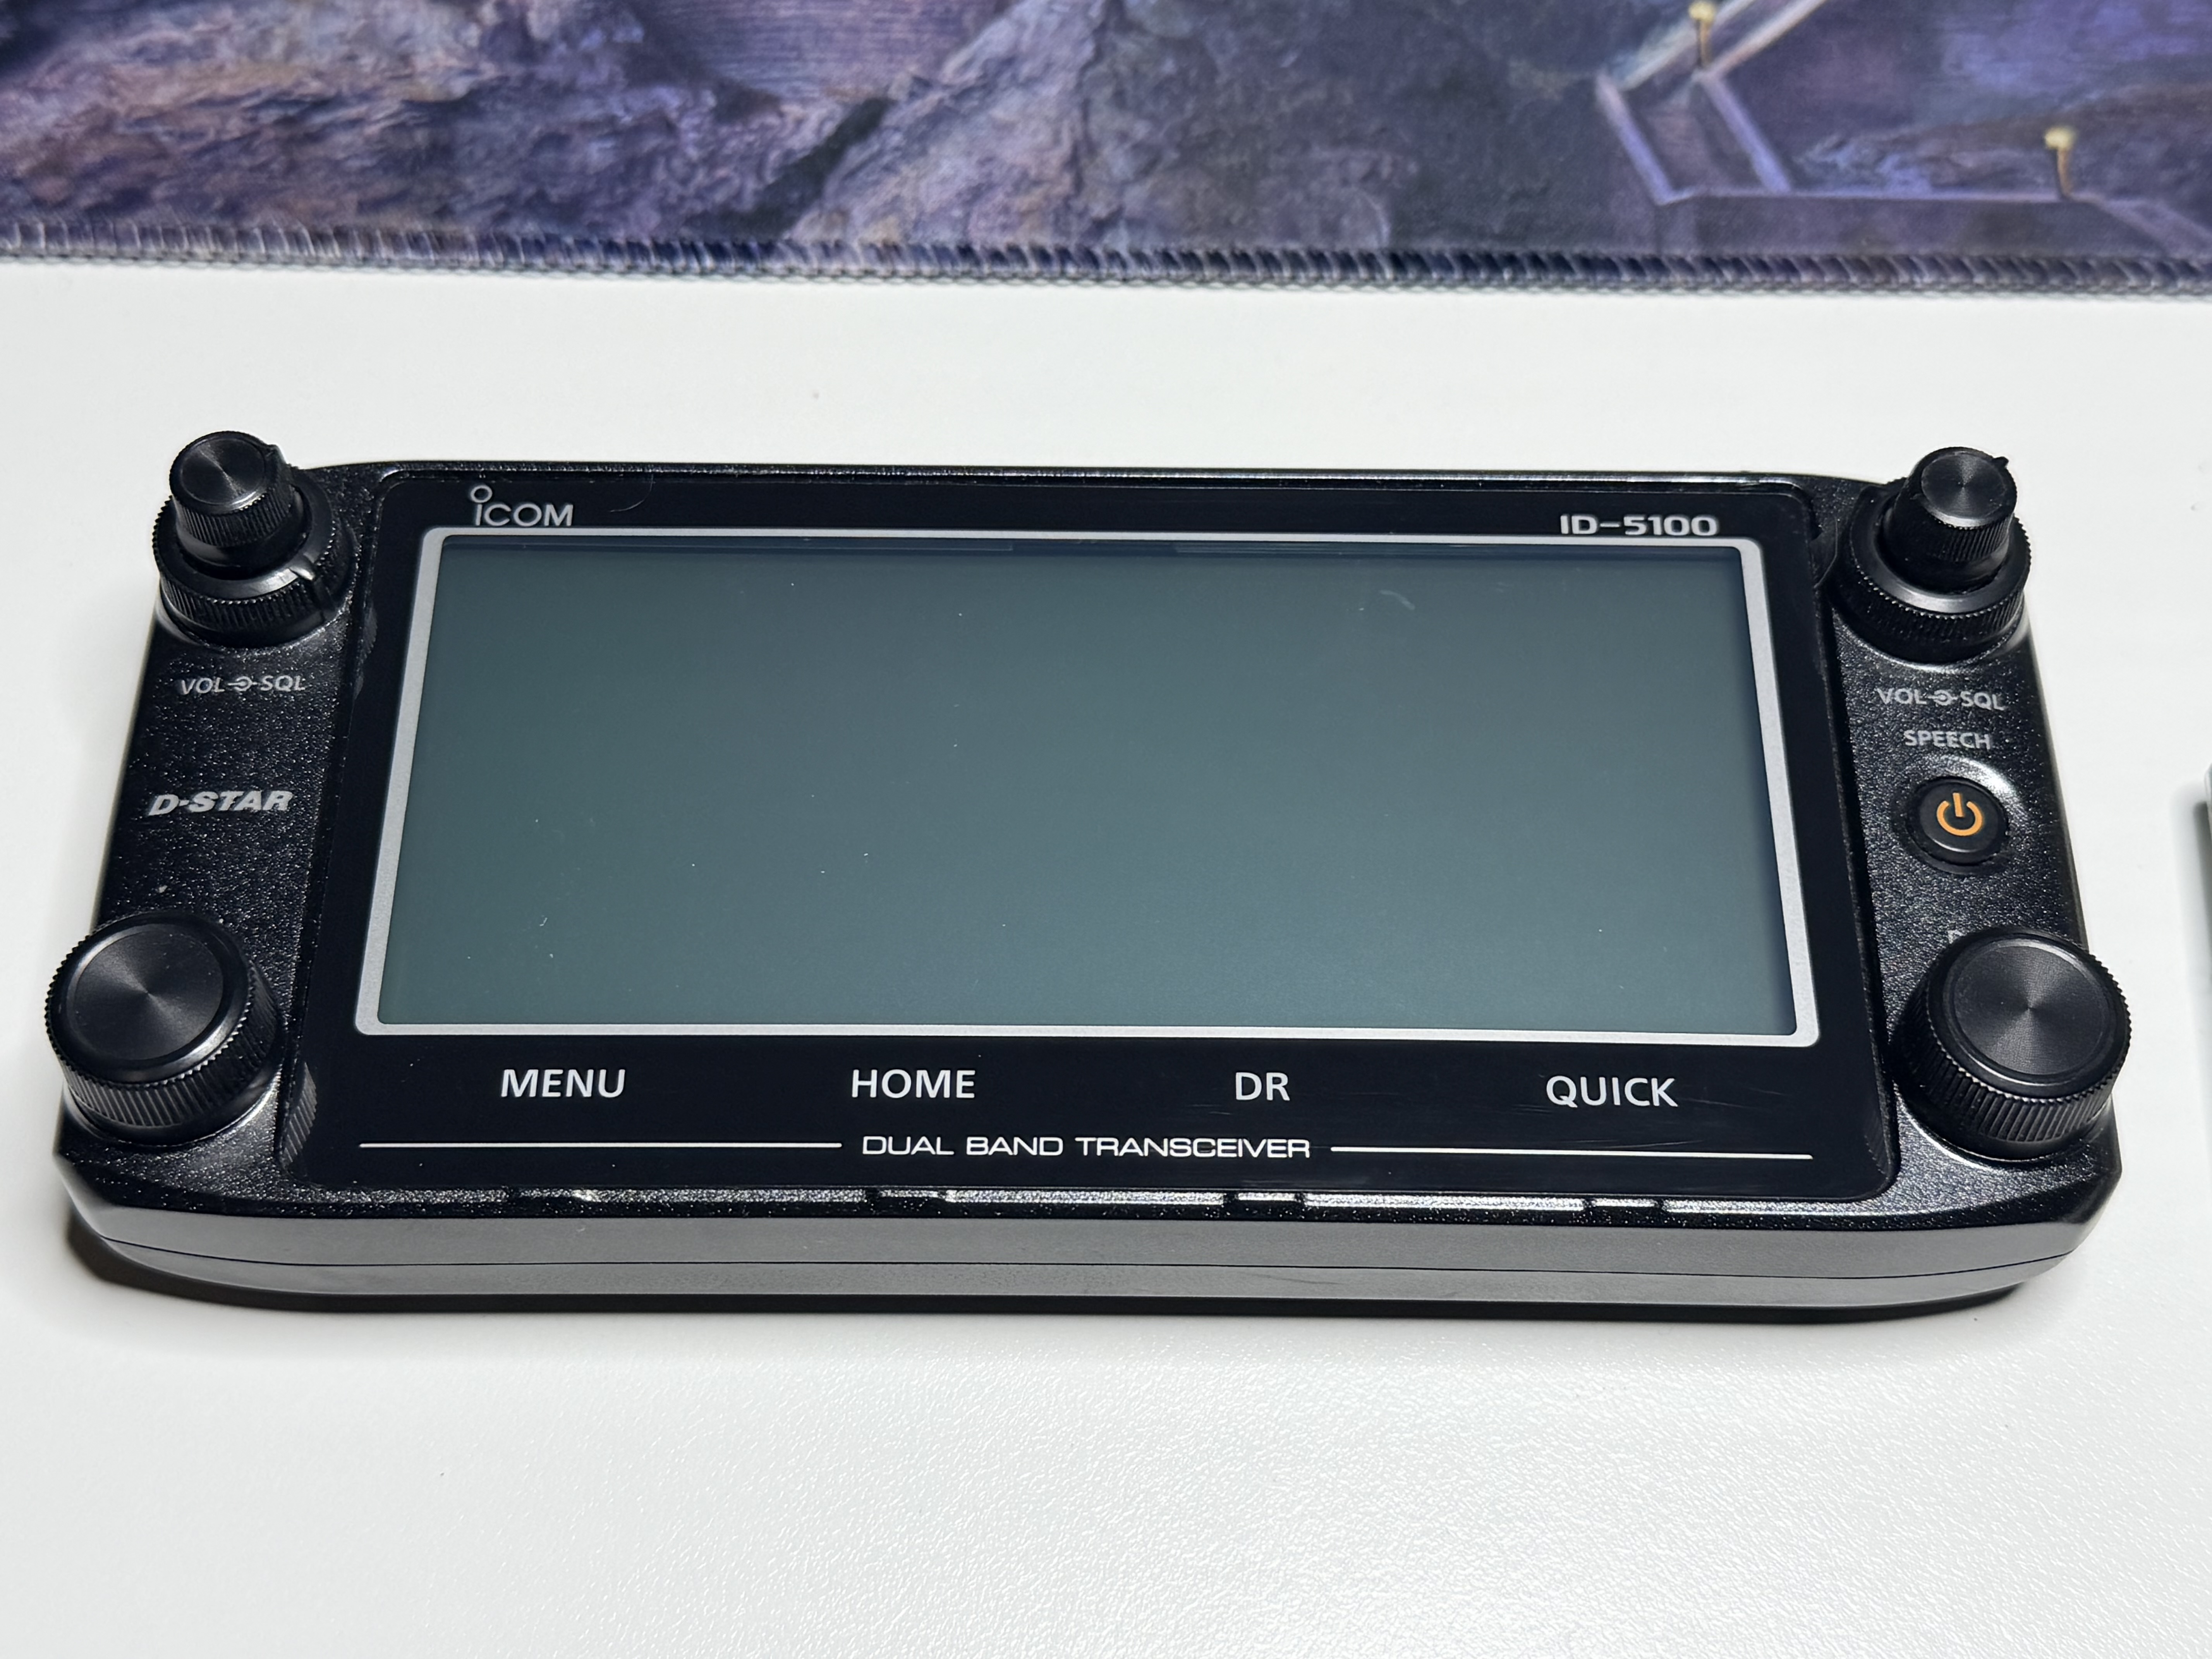
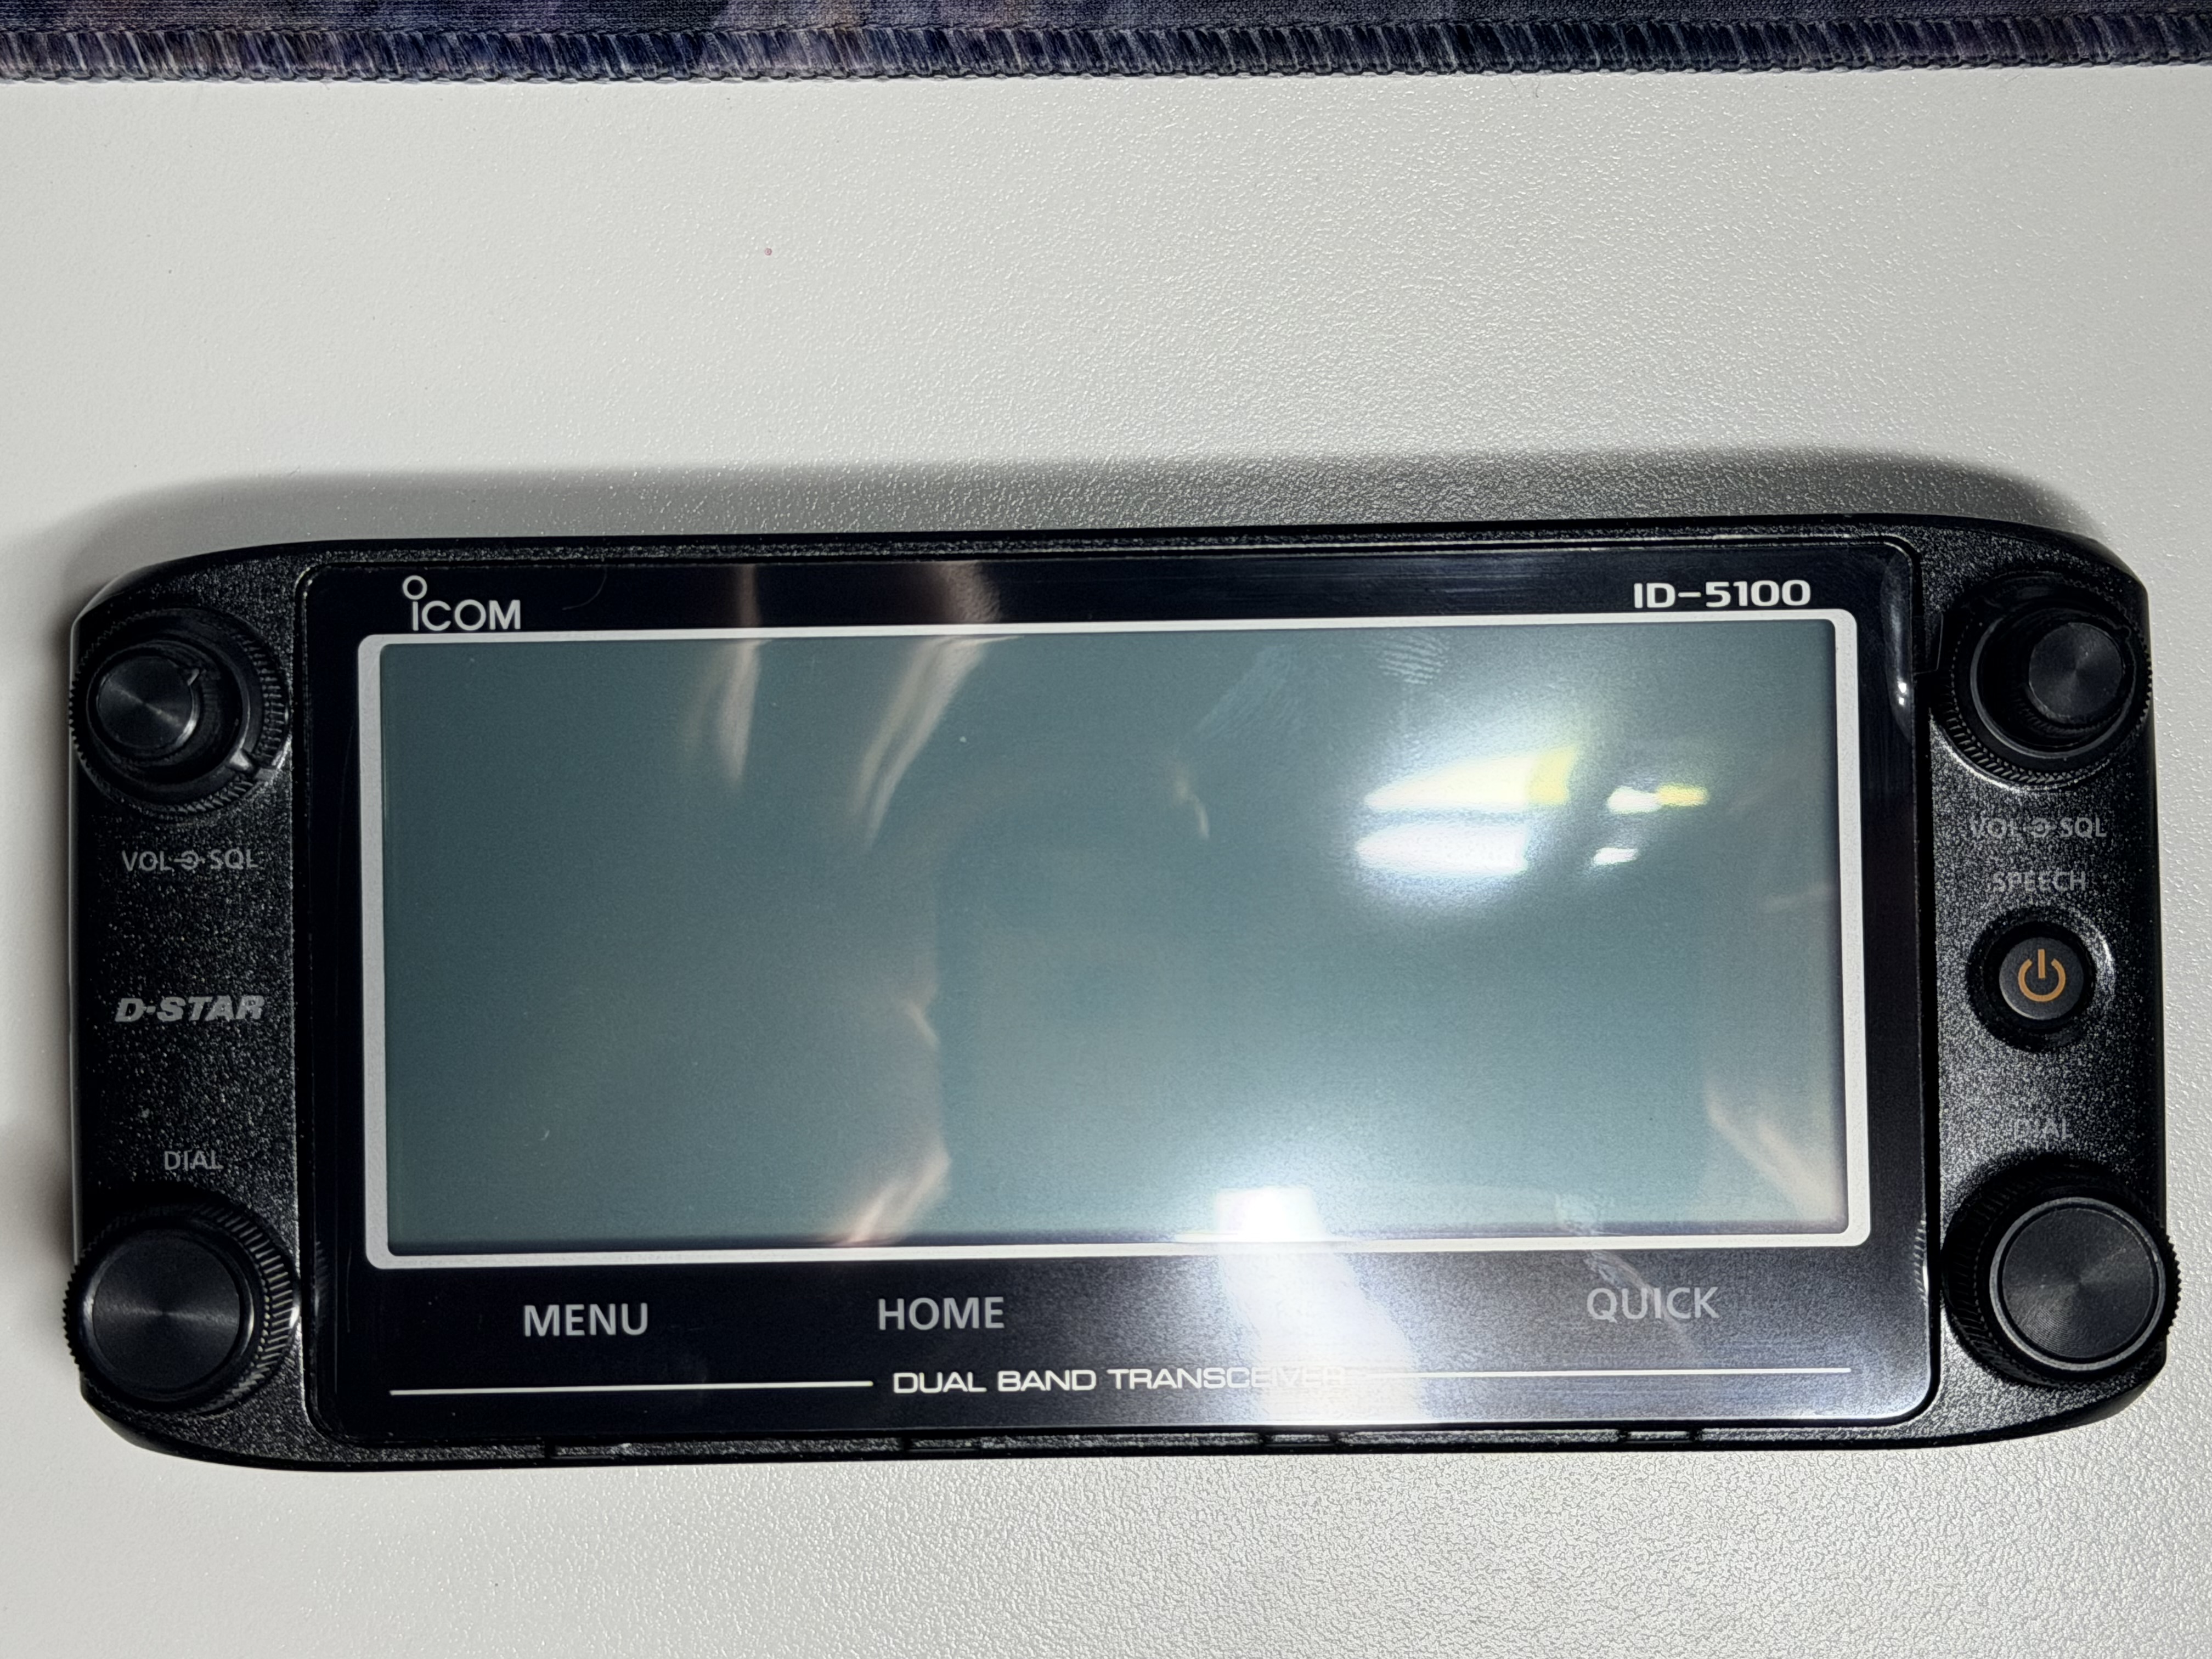
The ID-5100A is worth rescuing because it is not just any old mobile with a pretty face. It is a proper dual-band D-STAR mobile with a large touch controller, integrated GPS in the head unit, dualwatch capability, and 50 W output on both VHF and UHF. It is a radio with enough capability to justify repair if the numbers work.
And in this case, the numbers did work.
At A$350 for the damaged radio, even with the replacement parts added in, the sums still made sense. Not “free radio” sense, and not “I have defeated economics” sense, but sensible enough that I could justify the repair and end up with a radio I actually wanted to use rather than merely admire for surviving surgery.
Icom Australia Deserves Some Credit Here
This part deserves to be said plainly: Icom Australia was wonderfully helpful.
There is a big difference between a manufacturer theoretically supporting repair and a manufacturer actually making repair possible for normal people. In this case, Icom Australia did the latter. They were responsive, clear about what was needed, and happy to sell the replacement parts directly.
That is not a small thing.
Too much modern technology is held together by glue, vibes, proprietary nonsense, and corporate suspicion toward anyone holding a screwdriver. The usual repair experience is somewhere between “we do not supply that part” and “please buy a new product and reflect on your choices.” This was refreshingly different.
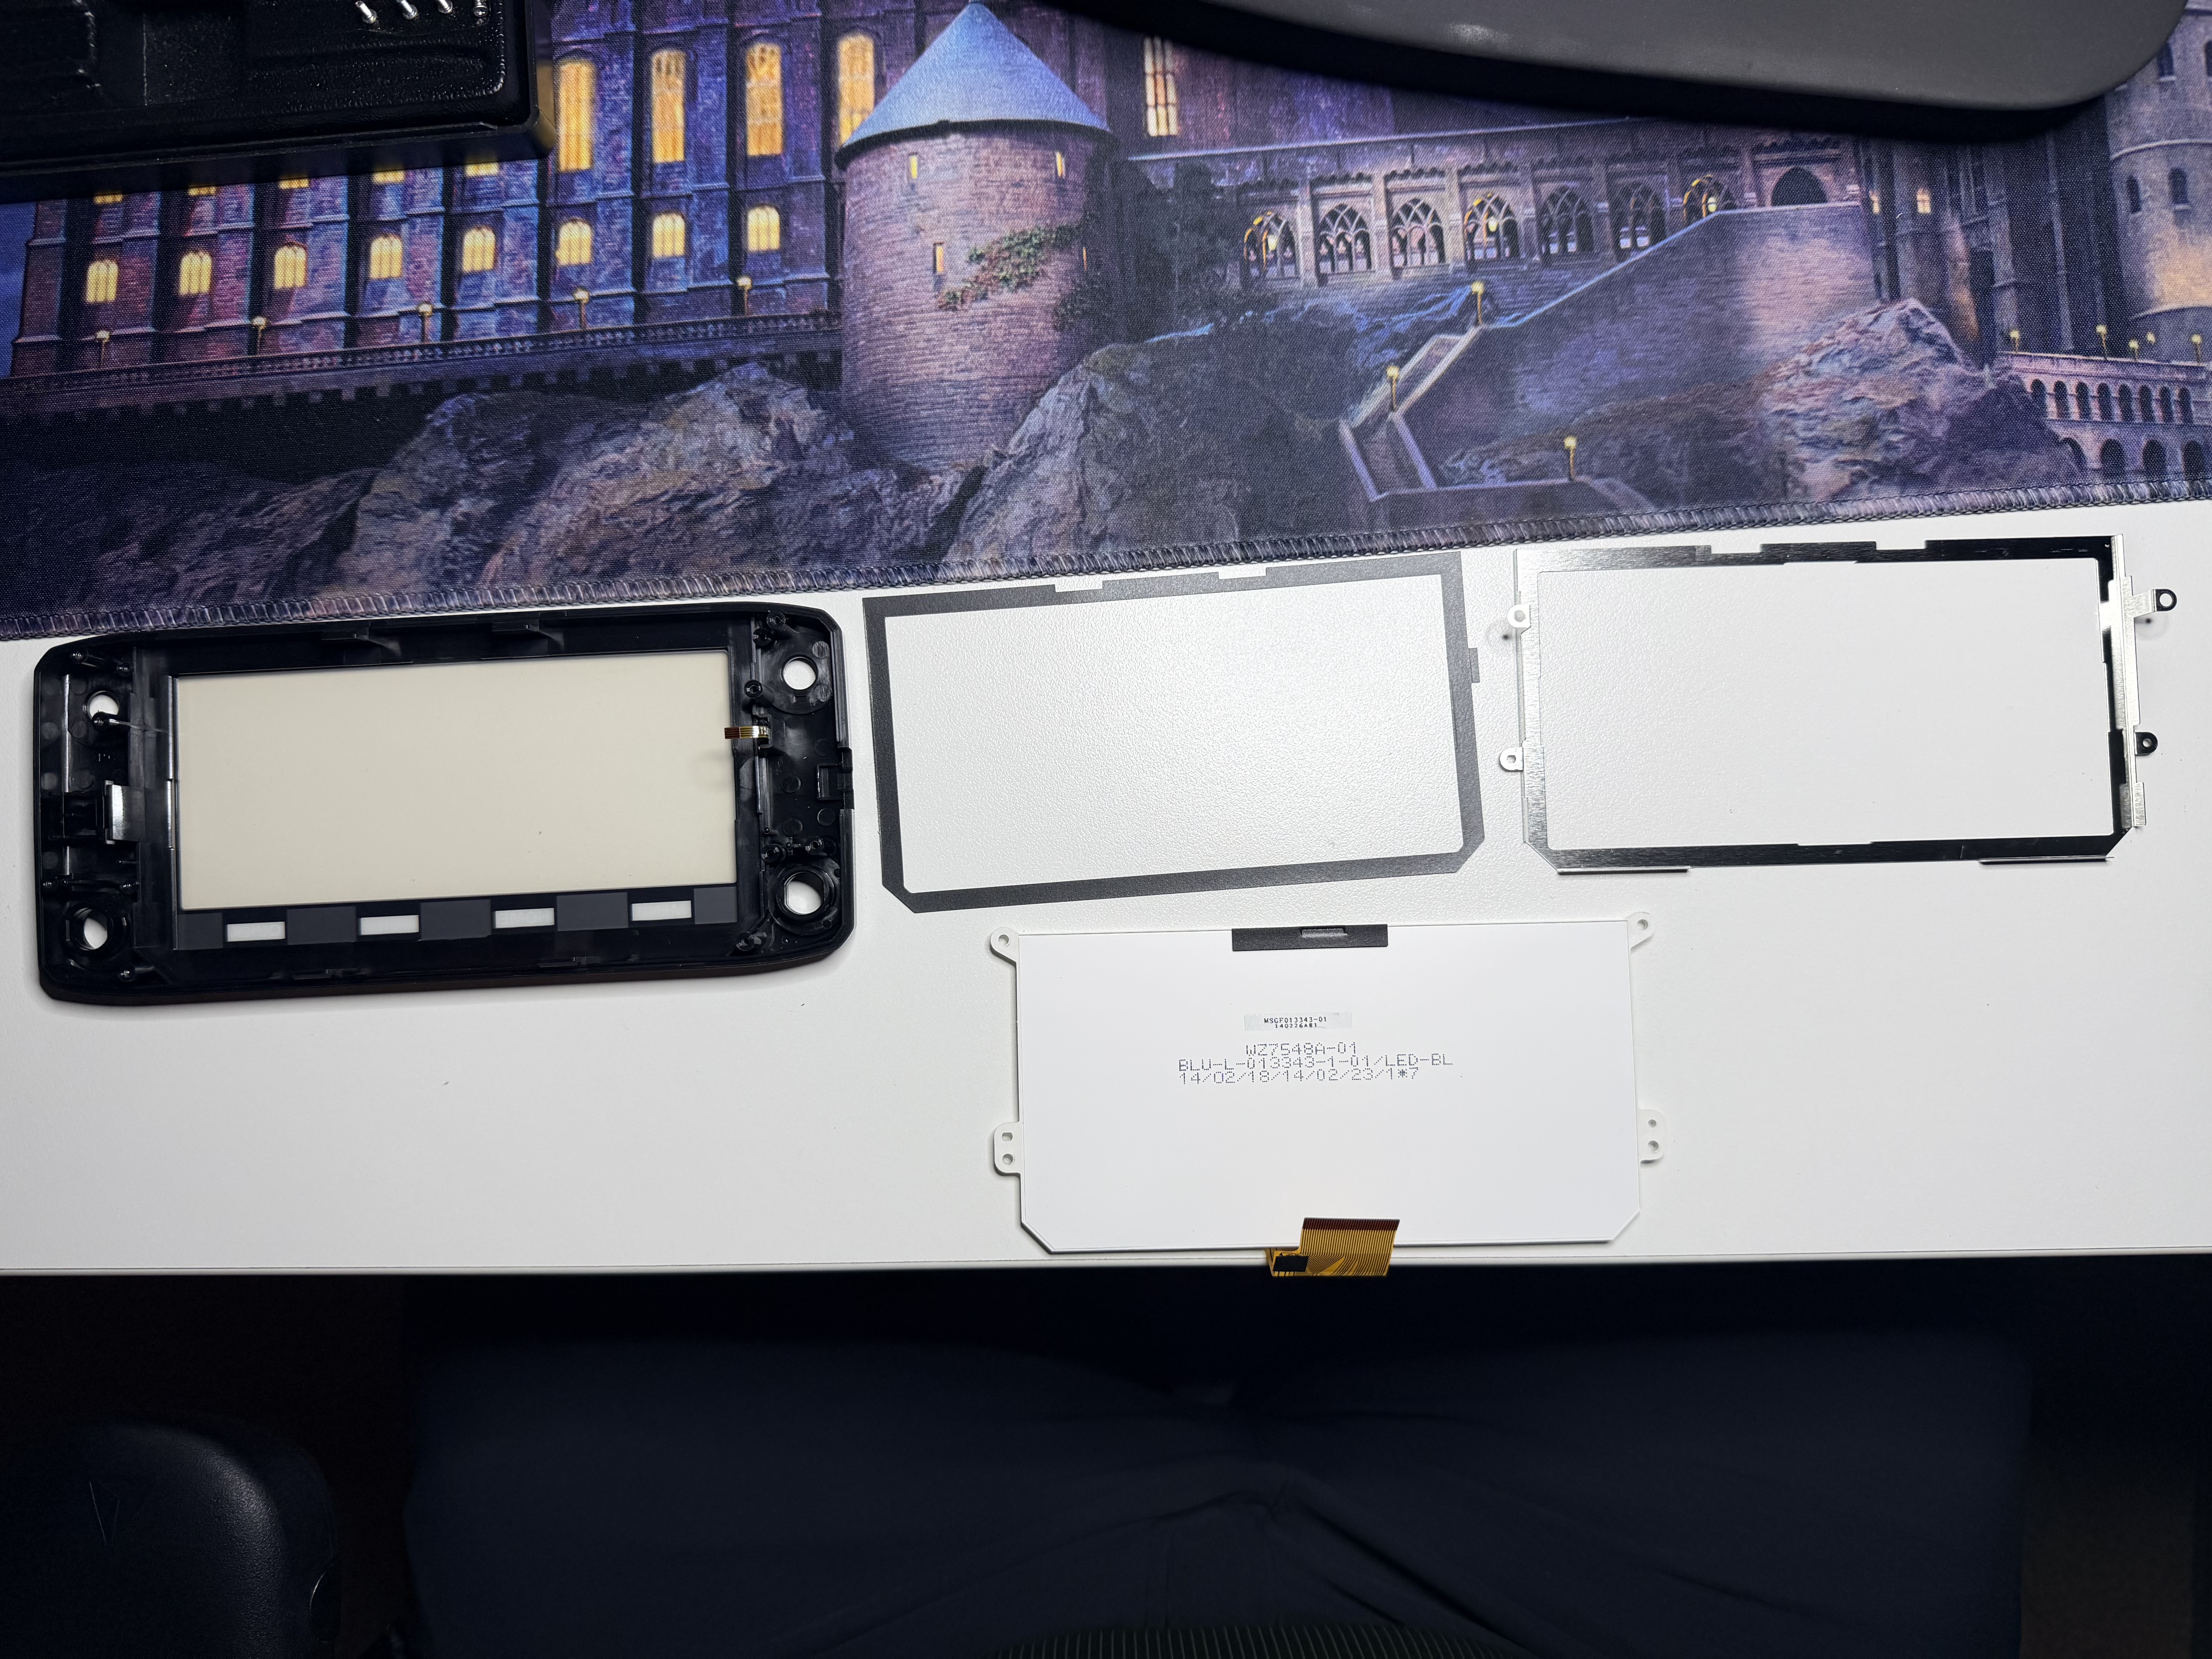
The replacement parts were:
WT5039-E(EP1 6910024590) for the touch screen atA$95.88plus GSTJIC-MSGF013343-01(DS1 5030003870) for the LCD atA$125.61plus GST- freight and handling at
A$15.00plus GST
That put the total at A$260.14 including GST.
For a radio in this class, that felt entirely reasonable. More importantly, it meant the repair was real. No scavenging. No guesswork. No dubious aftermarket listing with a title written in three languages and confidence in none of them. Just the right parts, from Icom, with minimal drama.
Tools Required, and One Borrowed Hair Dryer
The tool list was pleasingly ordinary:
- Phillips screwdrivers, sizes
0and1 - a couple of spudgers
- tweezers
- a hair dryer
The hair dryer was, of course, not mine. Given my ongoing and deeply unfair disagreement with my hairline, I borrowed my XYL VK4KLB’s hair dryer instead.
There is a joke somewhere in there about finally finding a piece of hair-care equipment with a clear role in amateur radio. In practice, it was genuinely useful. This job was not difficult because of any deep electronics wizardry. It was difficult because screen assemblies are adhesive, glass, ribbon tails, and consequences. Heat makes that much more manageable.
And to be clear, this was not a “30 minute job” in the strict clock-on-the-wall sense. The photos run from about 20:19 to 21:36 on 16 March 2026, which is about 1 hour 17 minutes. That said, the actual screwdriver-and-spudger part probably was much closer to the “half an hour of surgery” line I joked about afterwards. The rest was setup, photos, adhesive cleanup, and deliberately not rushing the steps most likely to turn new parts into old mistakes.
A Brief Appreciation of Screw Design
One thing I appreciated almost immediately was how comparatively sane the ID-5100A head unit is to open.
A lot of modern technology feels like it was designed by a committee tasked with ensuring no human being ever reaches the inside without first encountering at least three screw types, two hidden clips, one ribbon cable trap, and a final layer of personal insult.
The ID-5100A was refreshingly normal by comparison.
There were screws. They looked like screws. They held together the things you would expect screws to hold together. You remove them, and the radio opens. What a radical and almost nostalgic design philosophy.
I am not saying the ID-5100A was built in some lost golden age of enlightened mechanical purity. I am saying it was built by people who still seemed to believe servicing a front panel should remain physically possible.
That deserves respect.
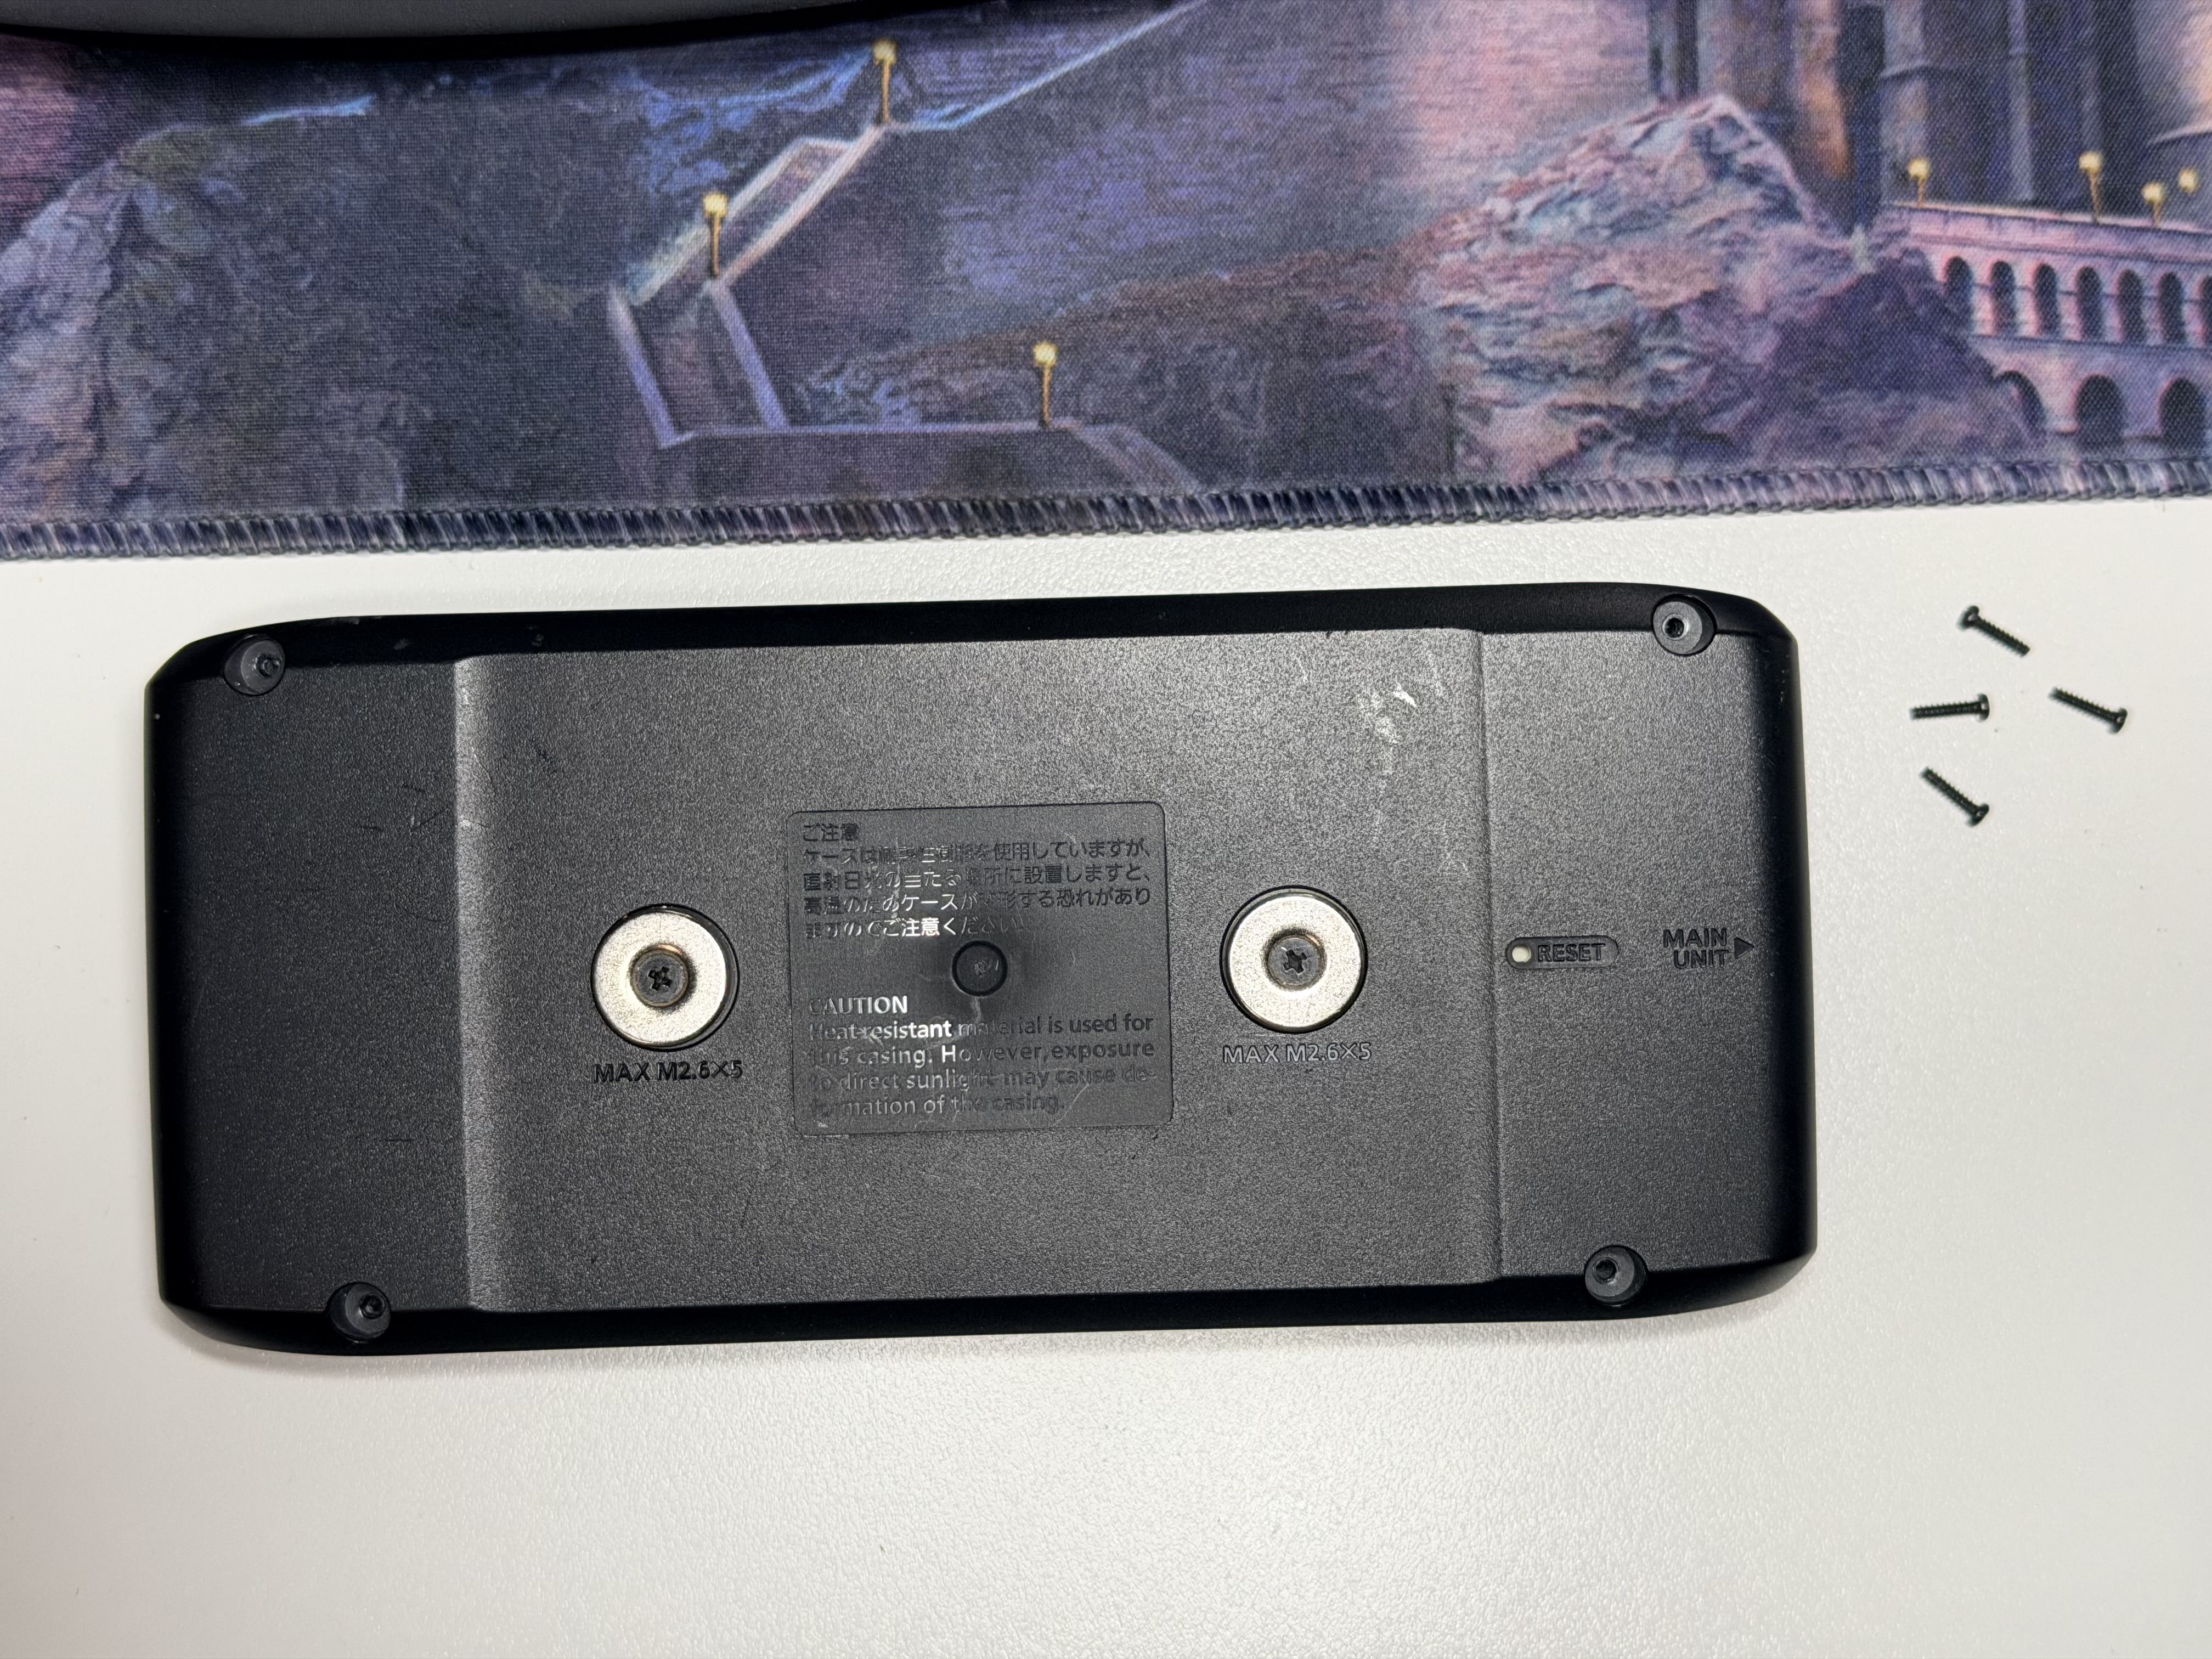
Opening the Head Unit
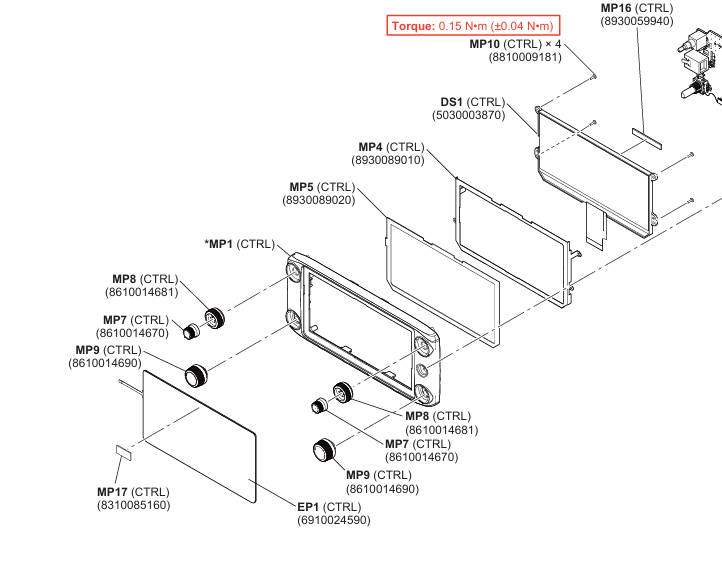
The first stage was simple enough: knobs off, case screws out, rear shell separated, and the front-panel board exposed.
Once the back came off, the radio stopped looking like a damaged appliance and started looking like a serviceable assembly. That is always a reassuring transition. From the outside, a cracked or dead front panel can feel like the whole radio is somehow ruined. Inside, it became obvious that the important parts were laid out sensibly and that the damaged screen stack was a repair problem, not a death sentence.
The main board lifted clear, the ribbons and connectors were accessible, and the job became one of method rather than bravery.
That is a far better category of repair.
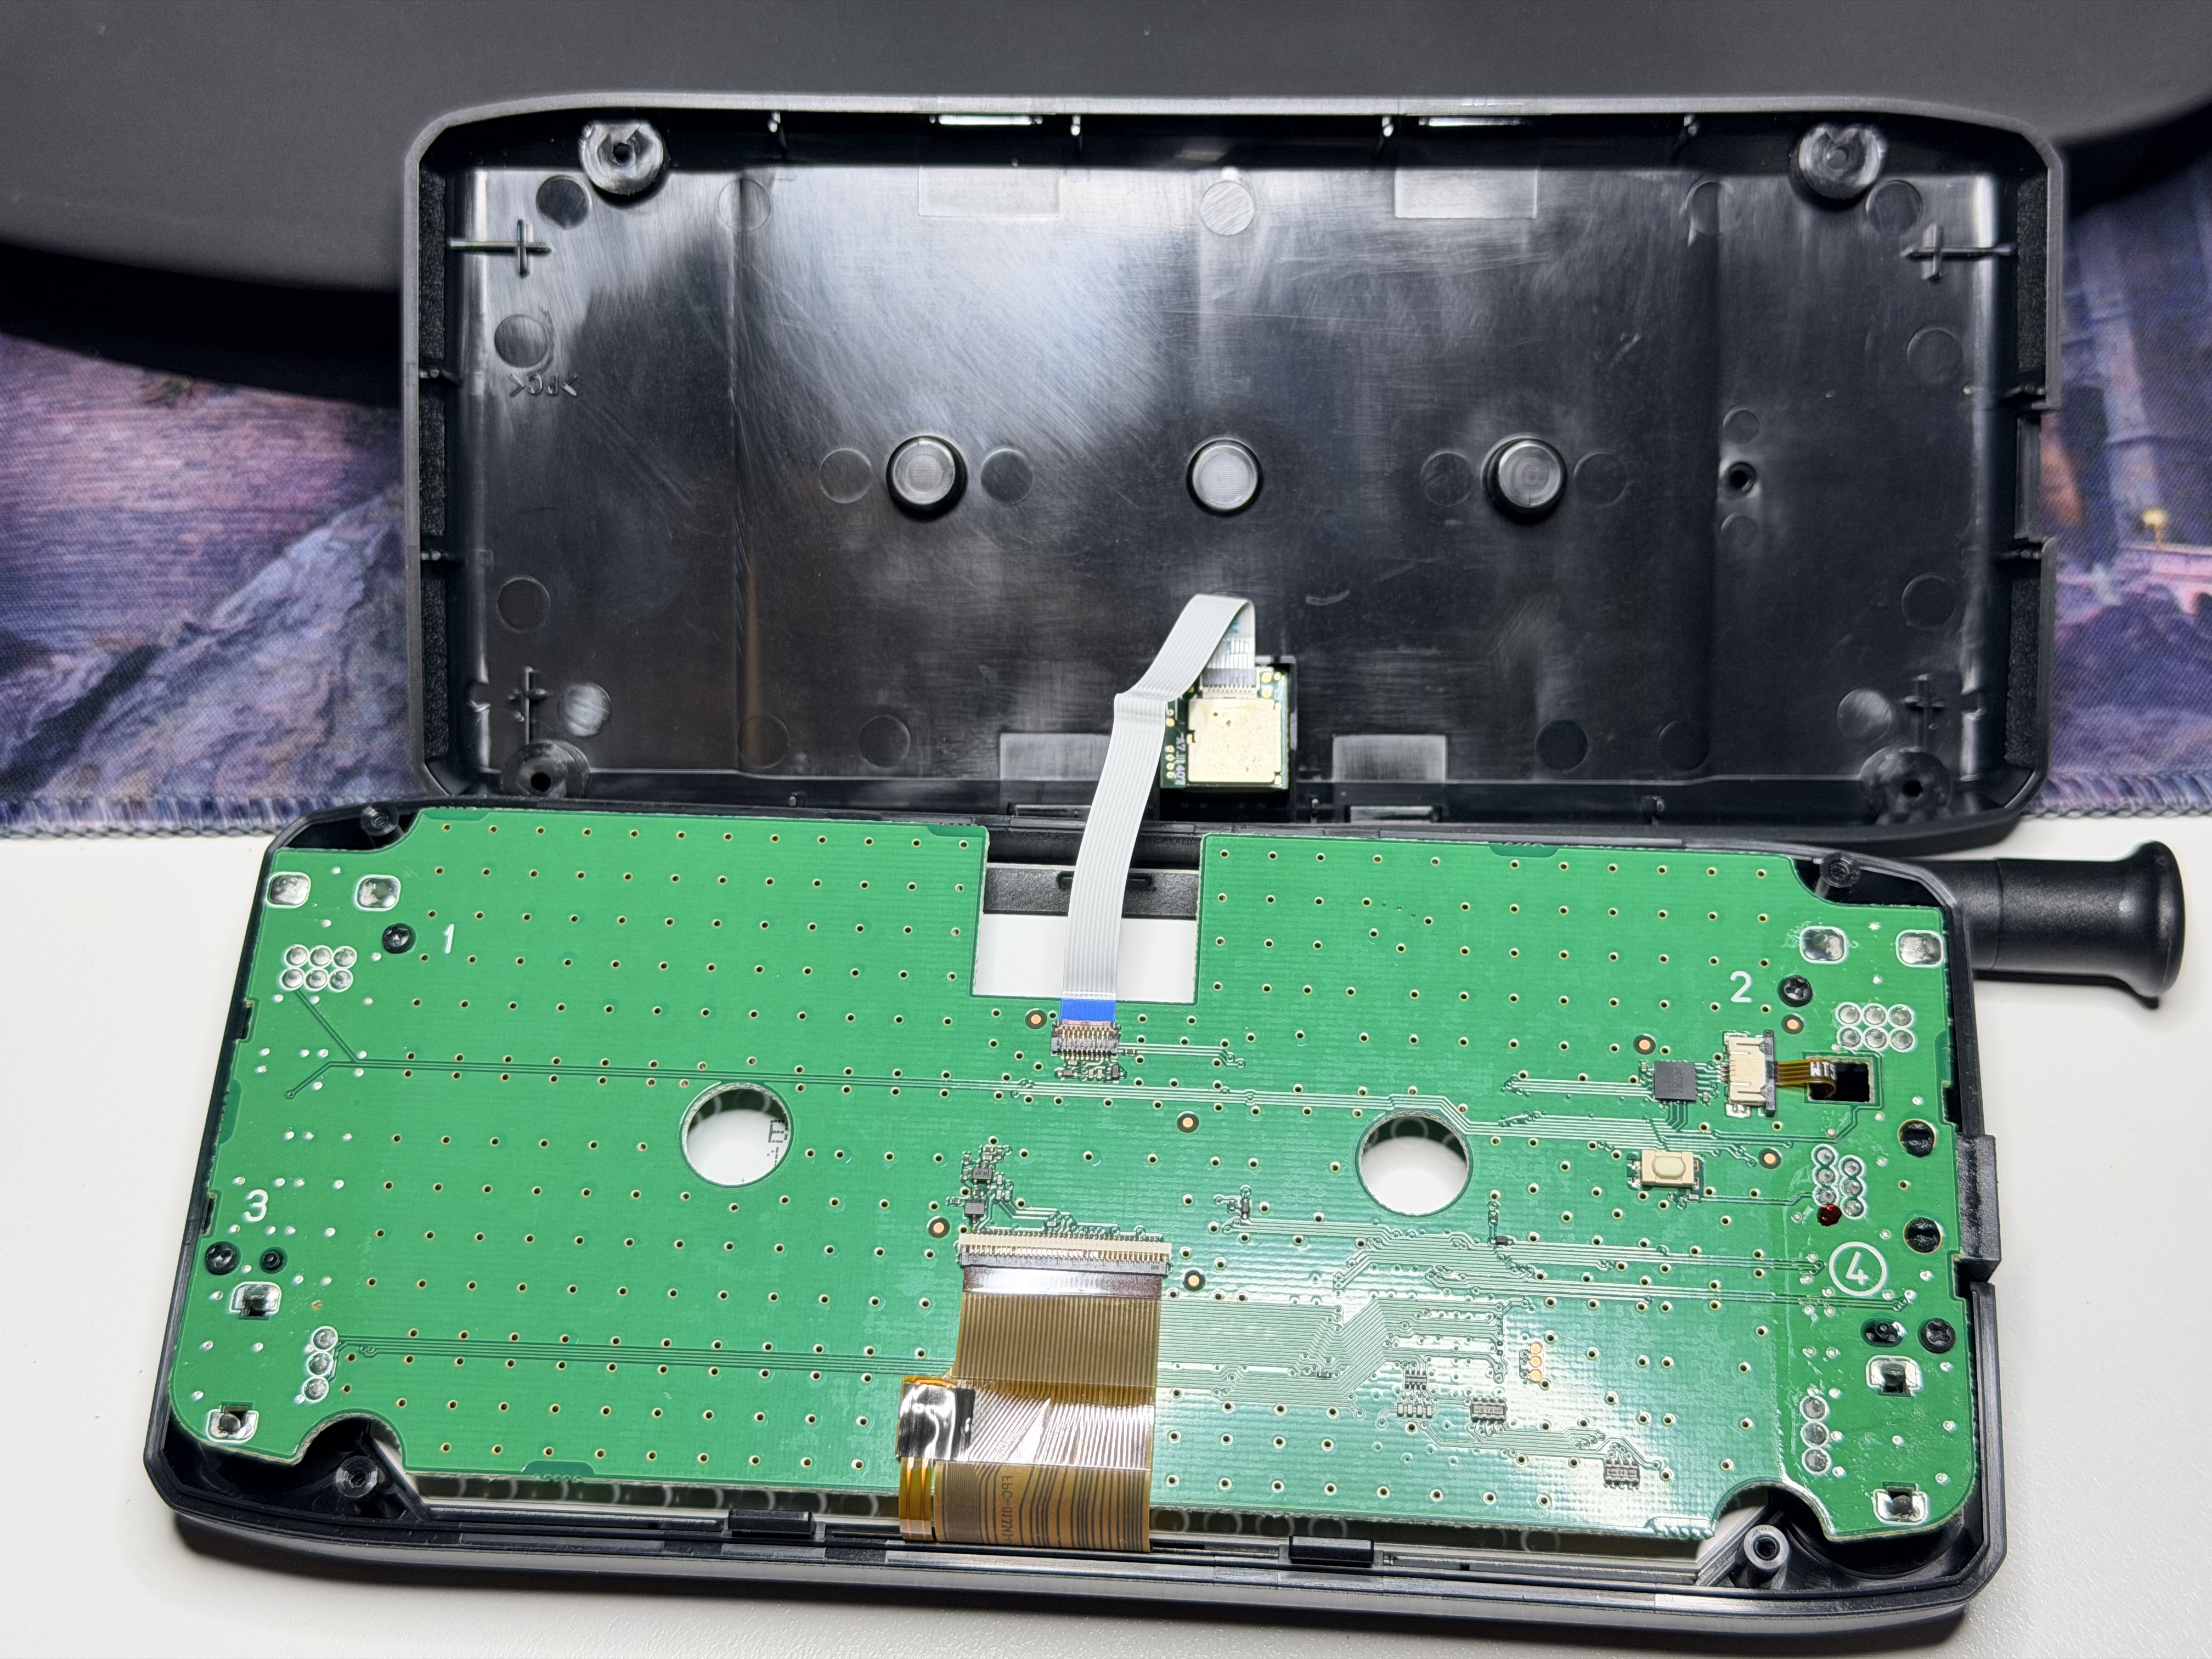
The Real Surgery
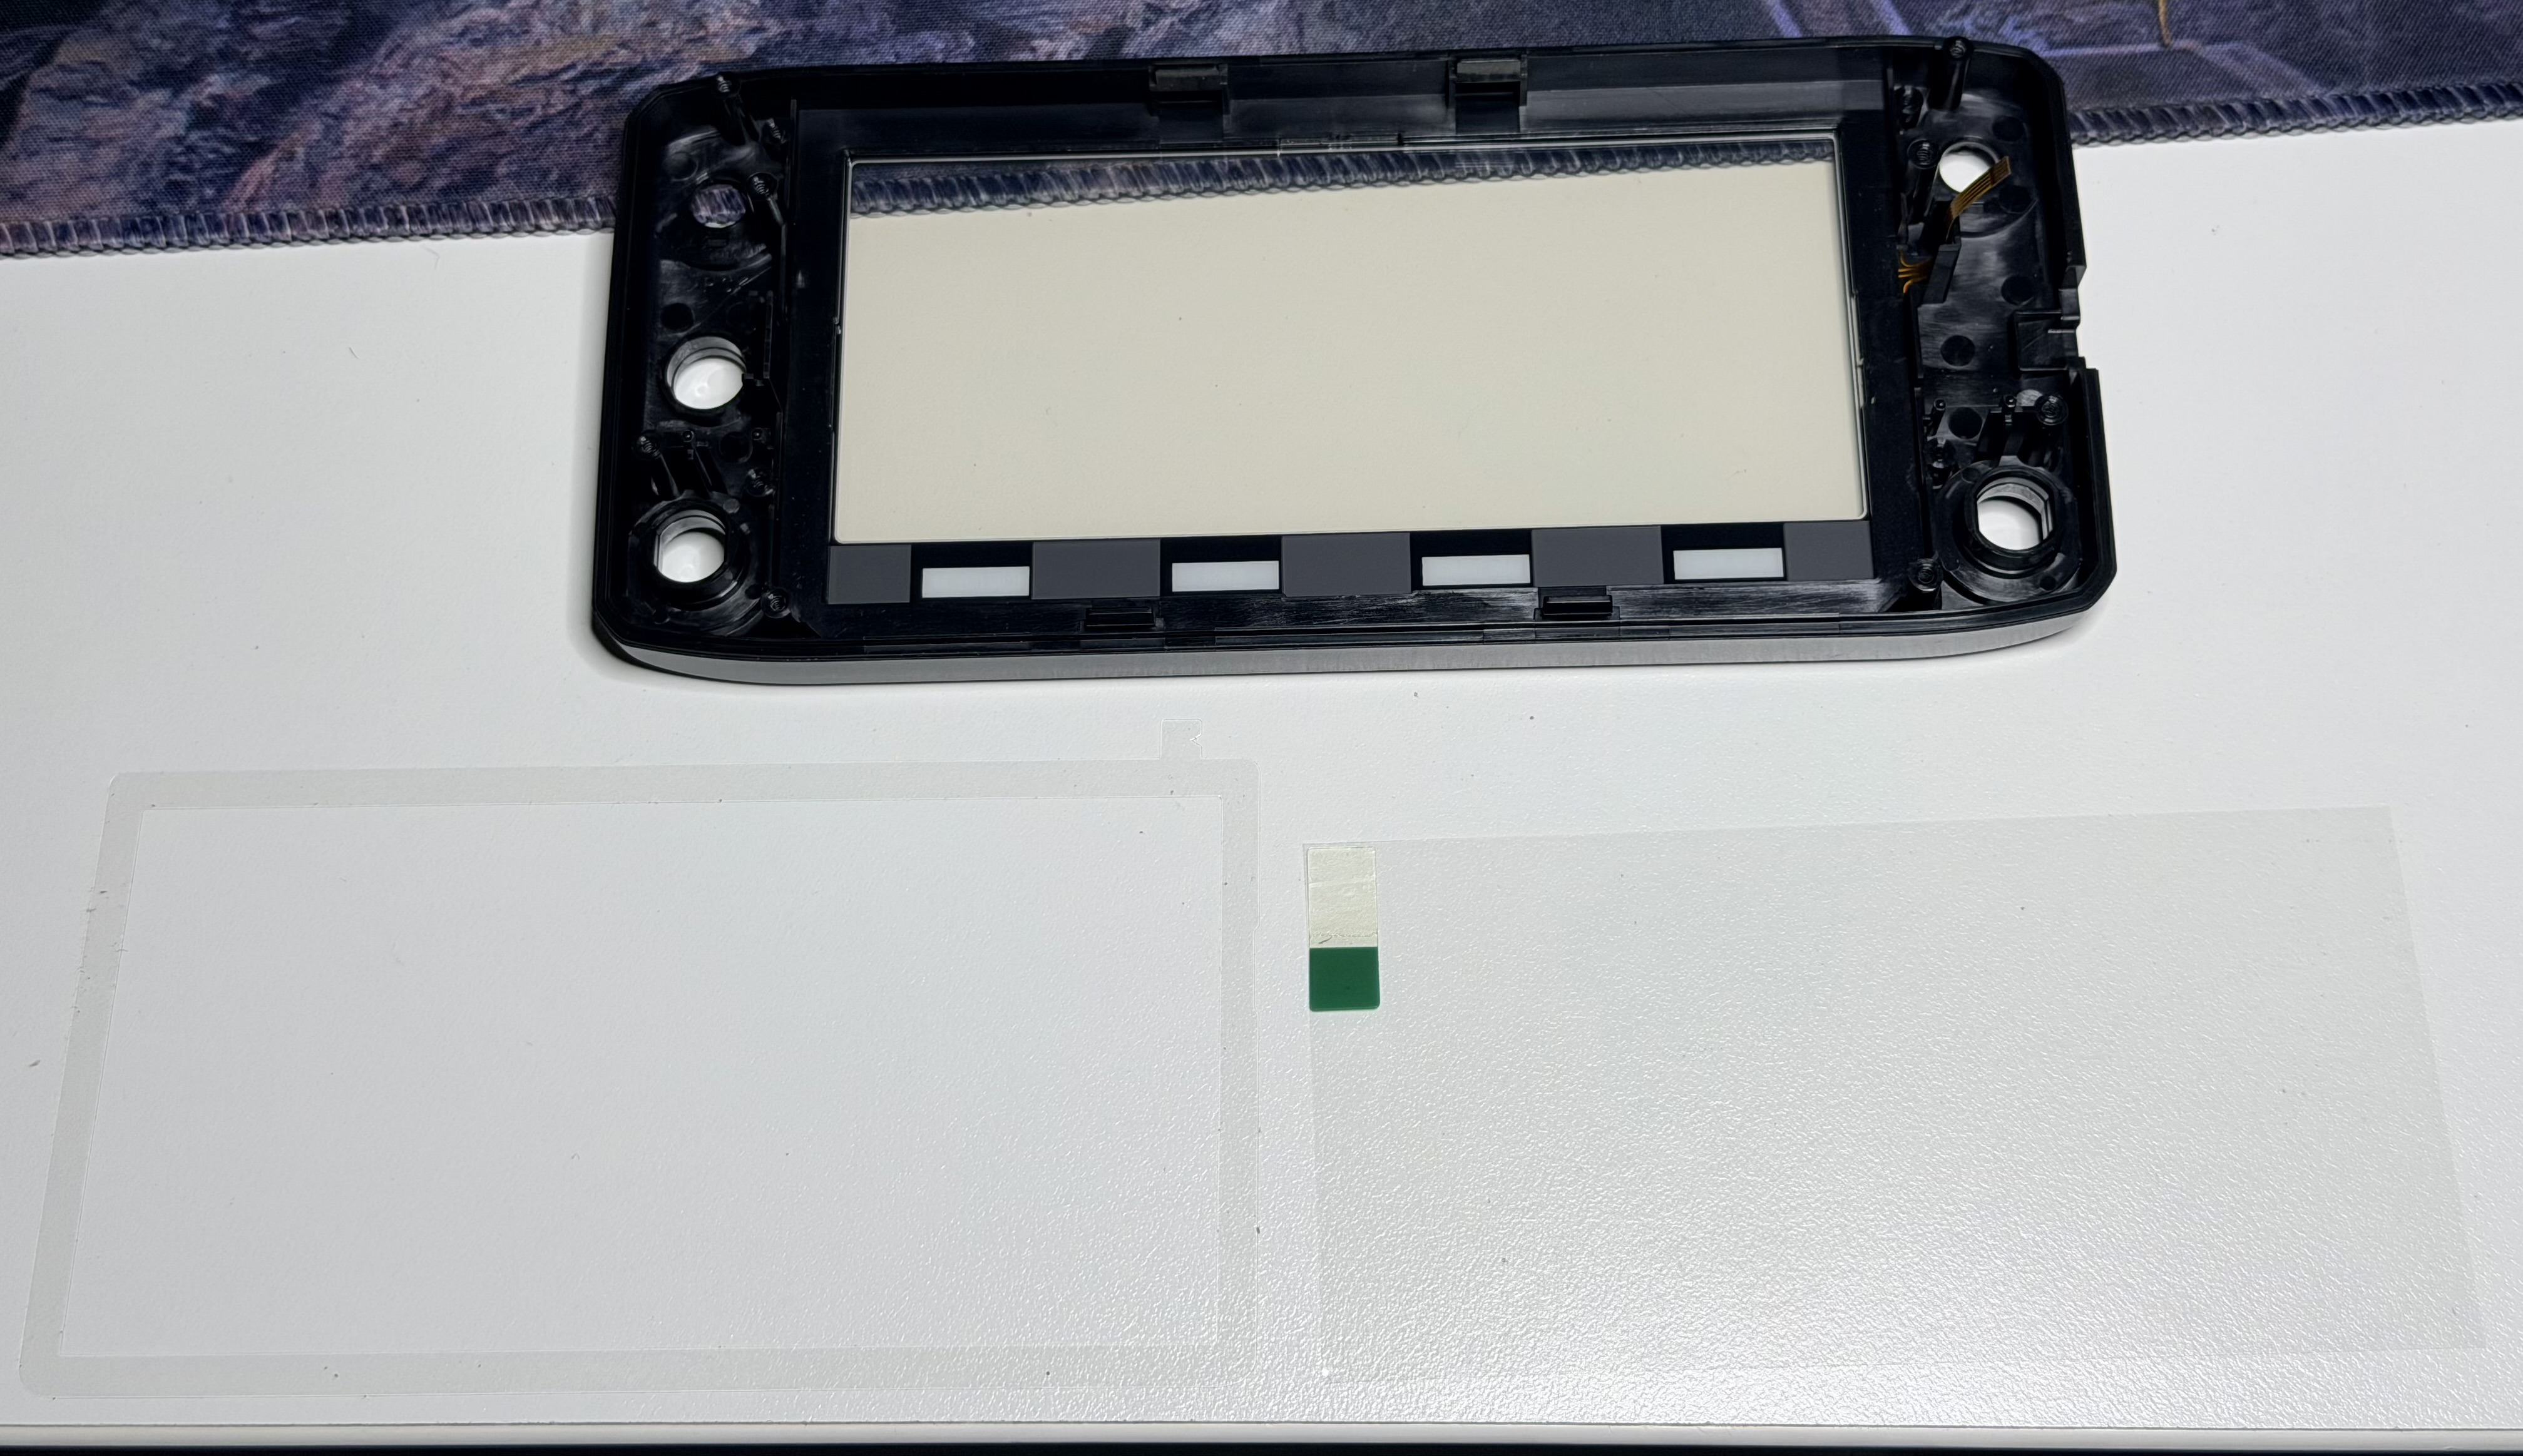
The actual work was in the display stack.
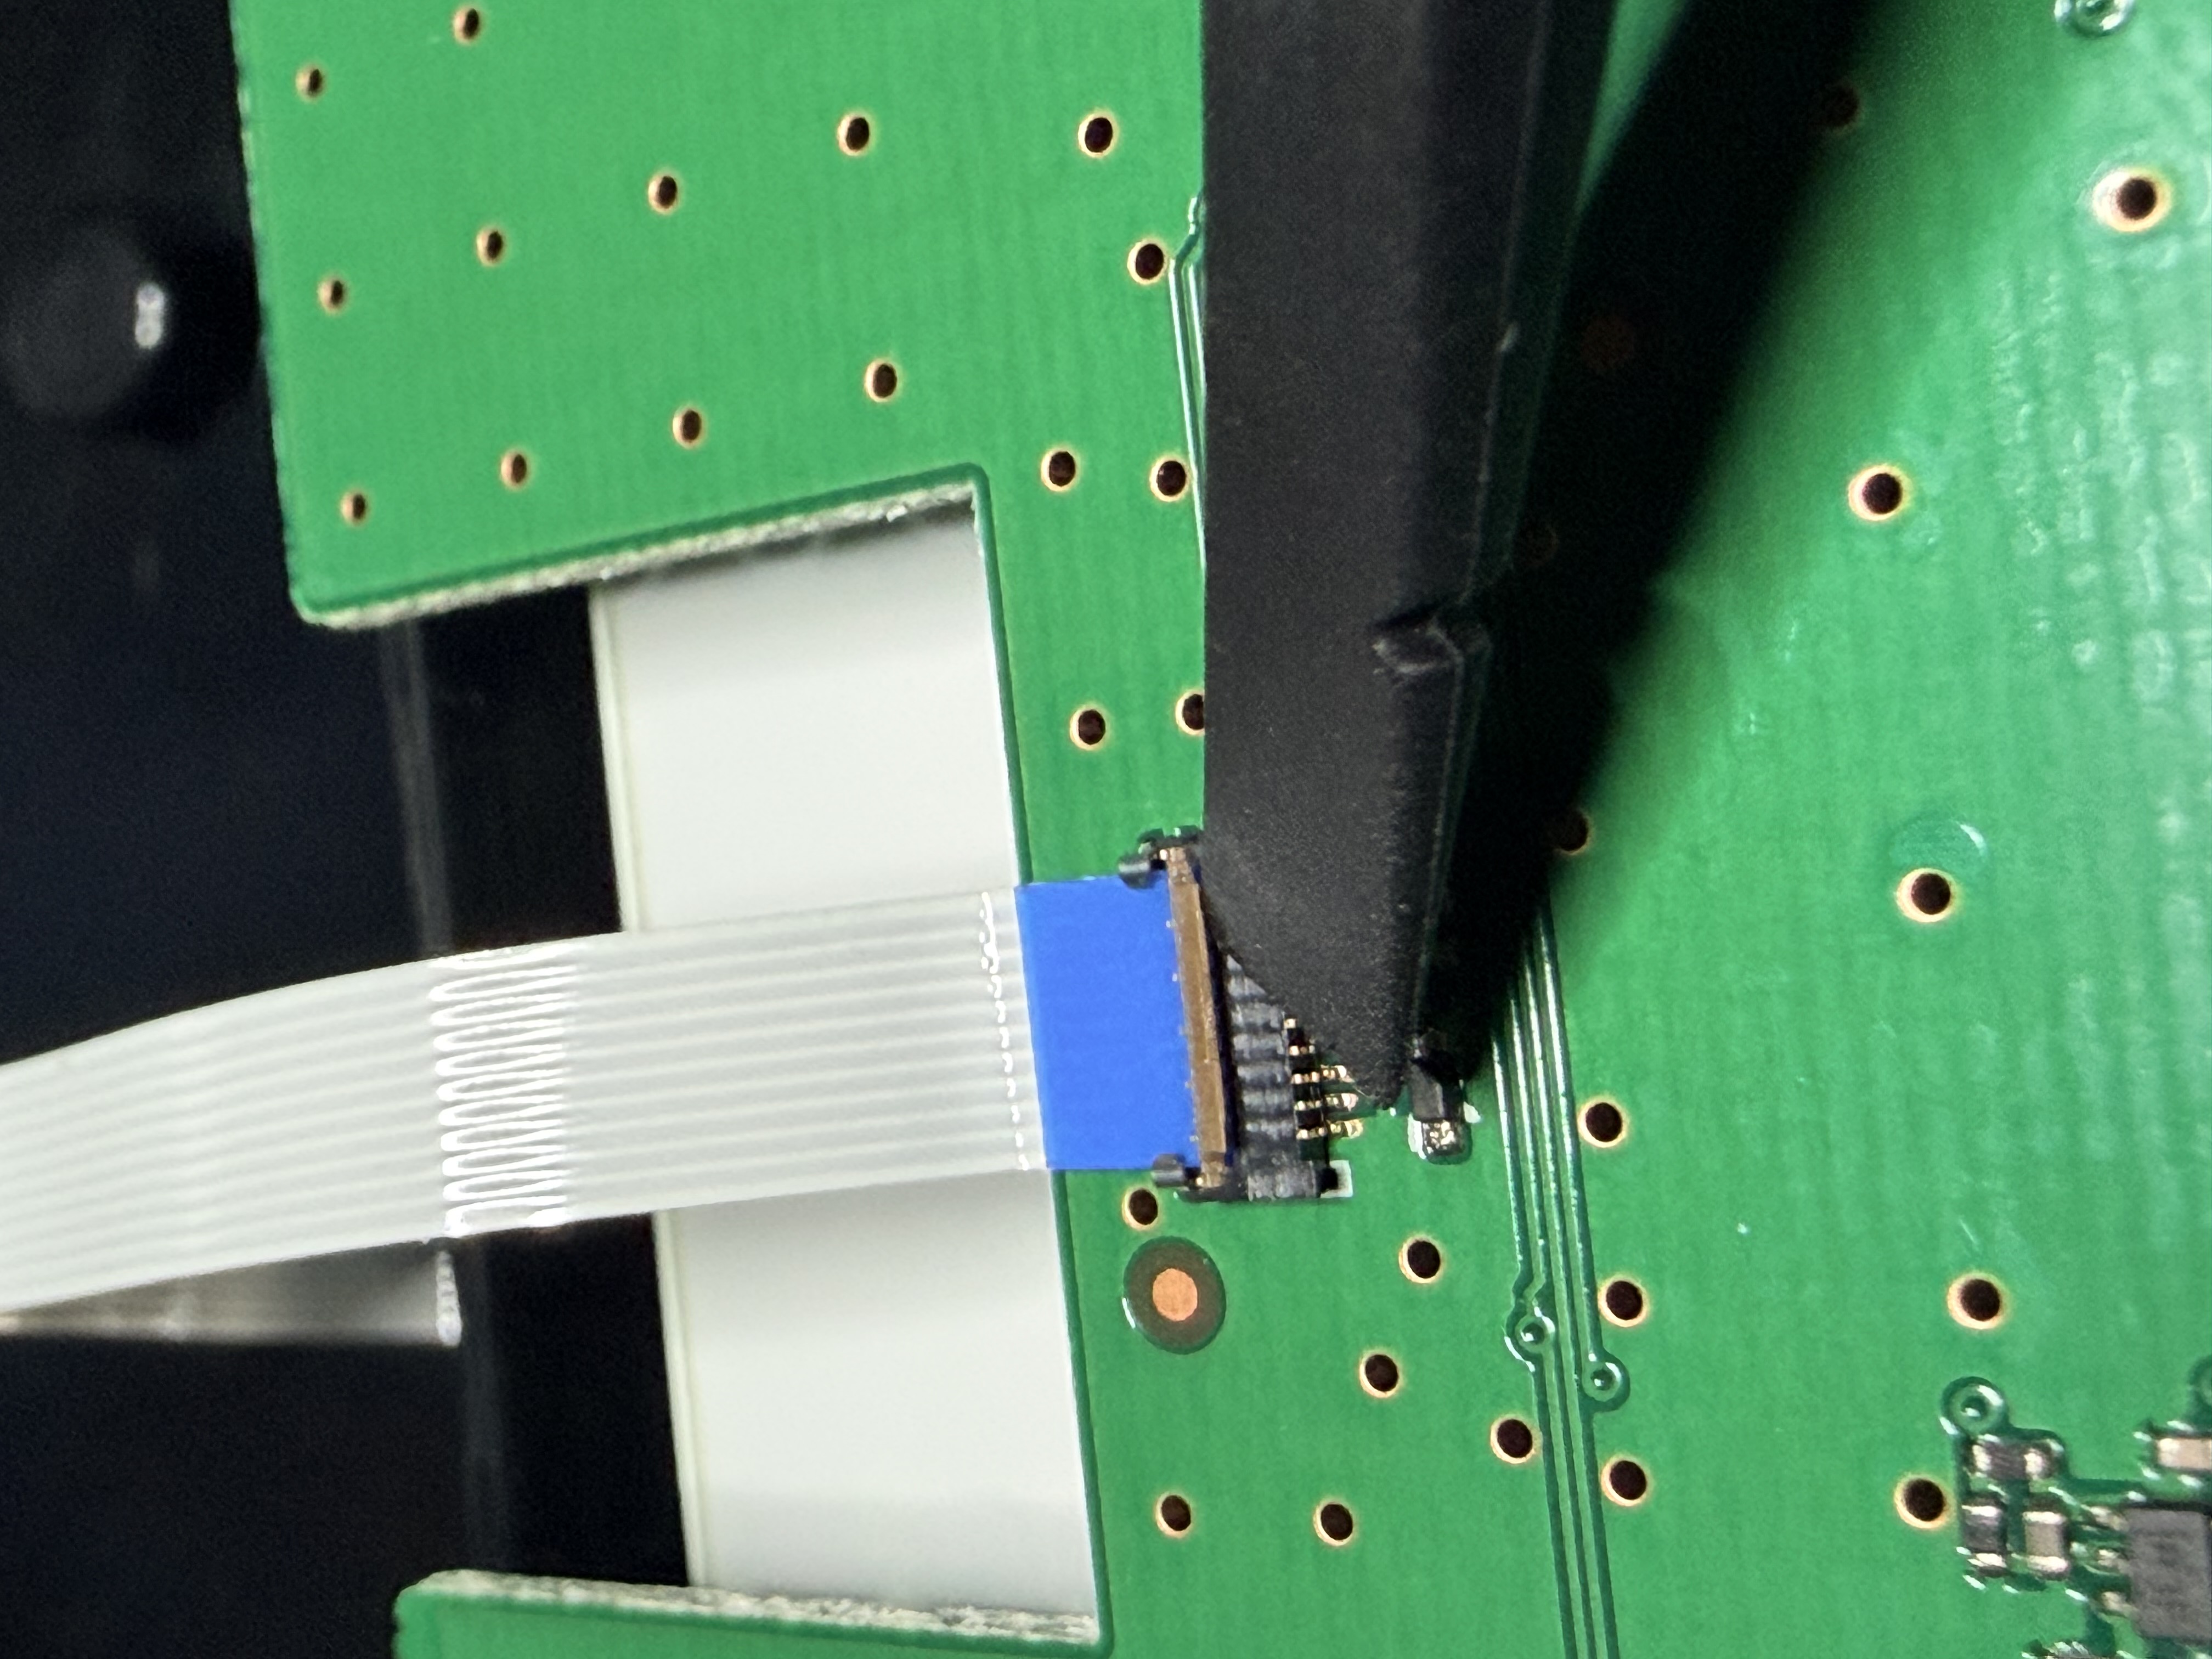
The touch screen and the LCD are separate parts, and both needed replacing. The touch screen tail runs into a small connector on the board, and that was one of the points where patience mattered more than confidence. Ribbon connectors tend to punish the sentence “that’ll do” more harshly than almost anything else in electronics repair.
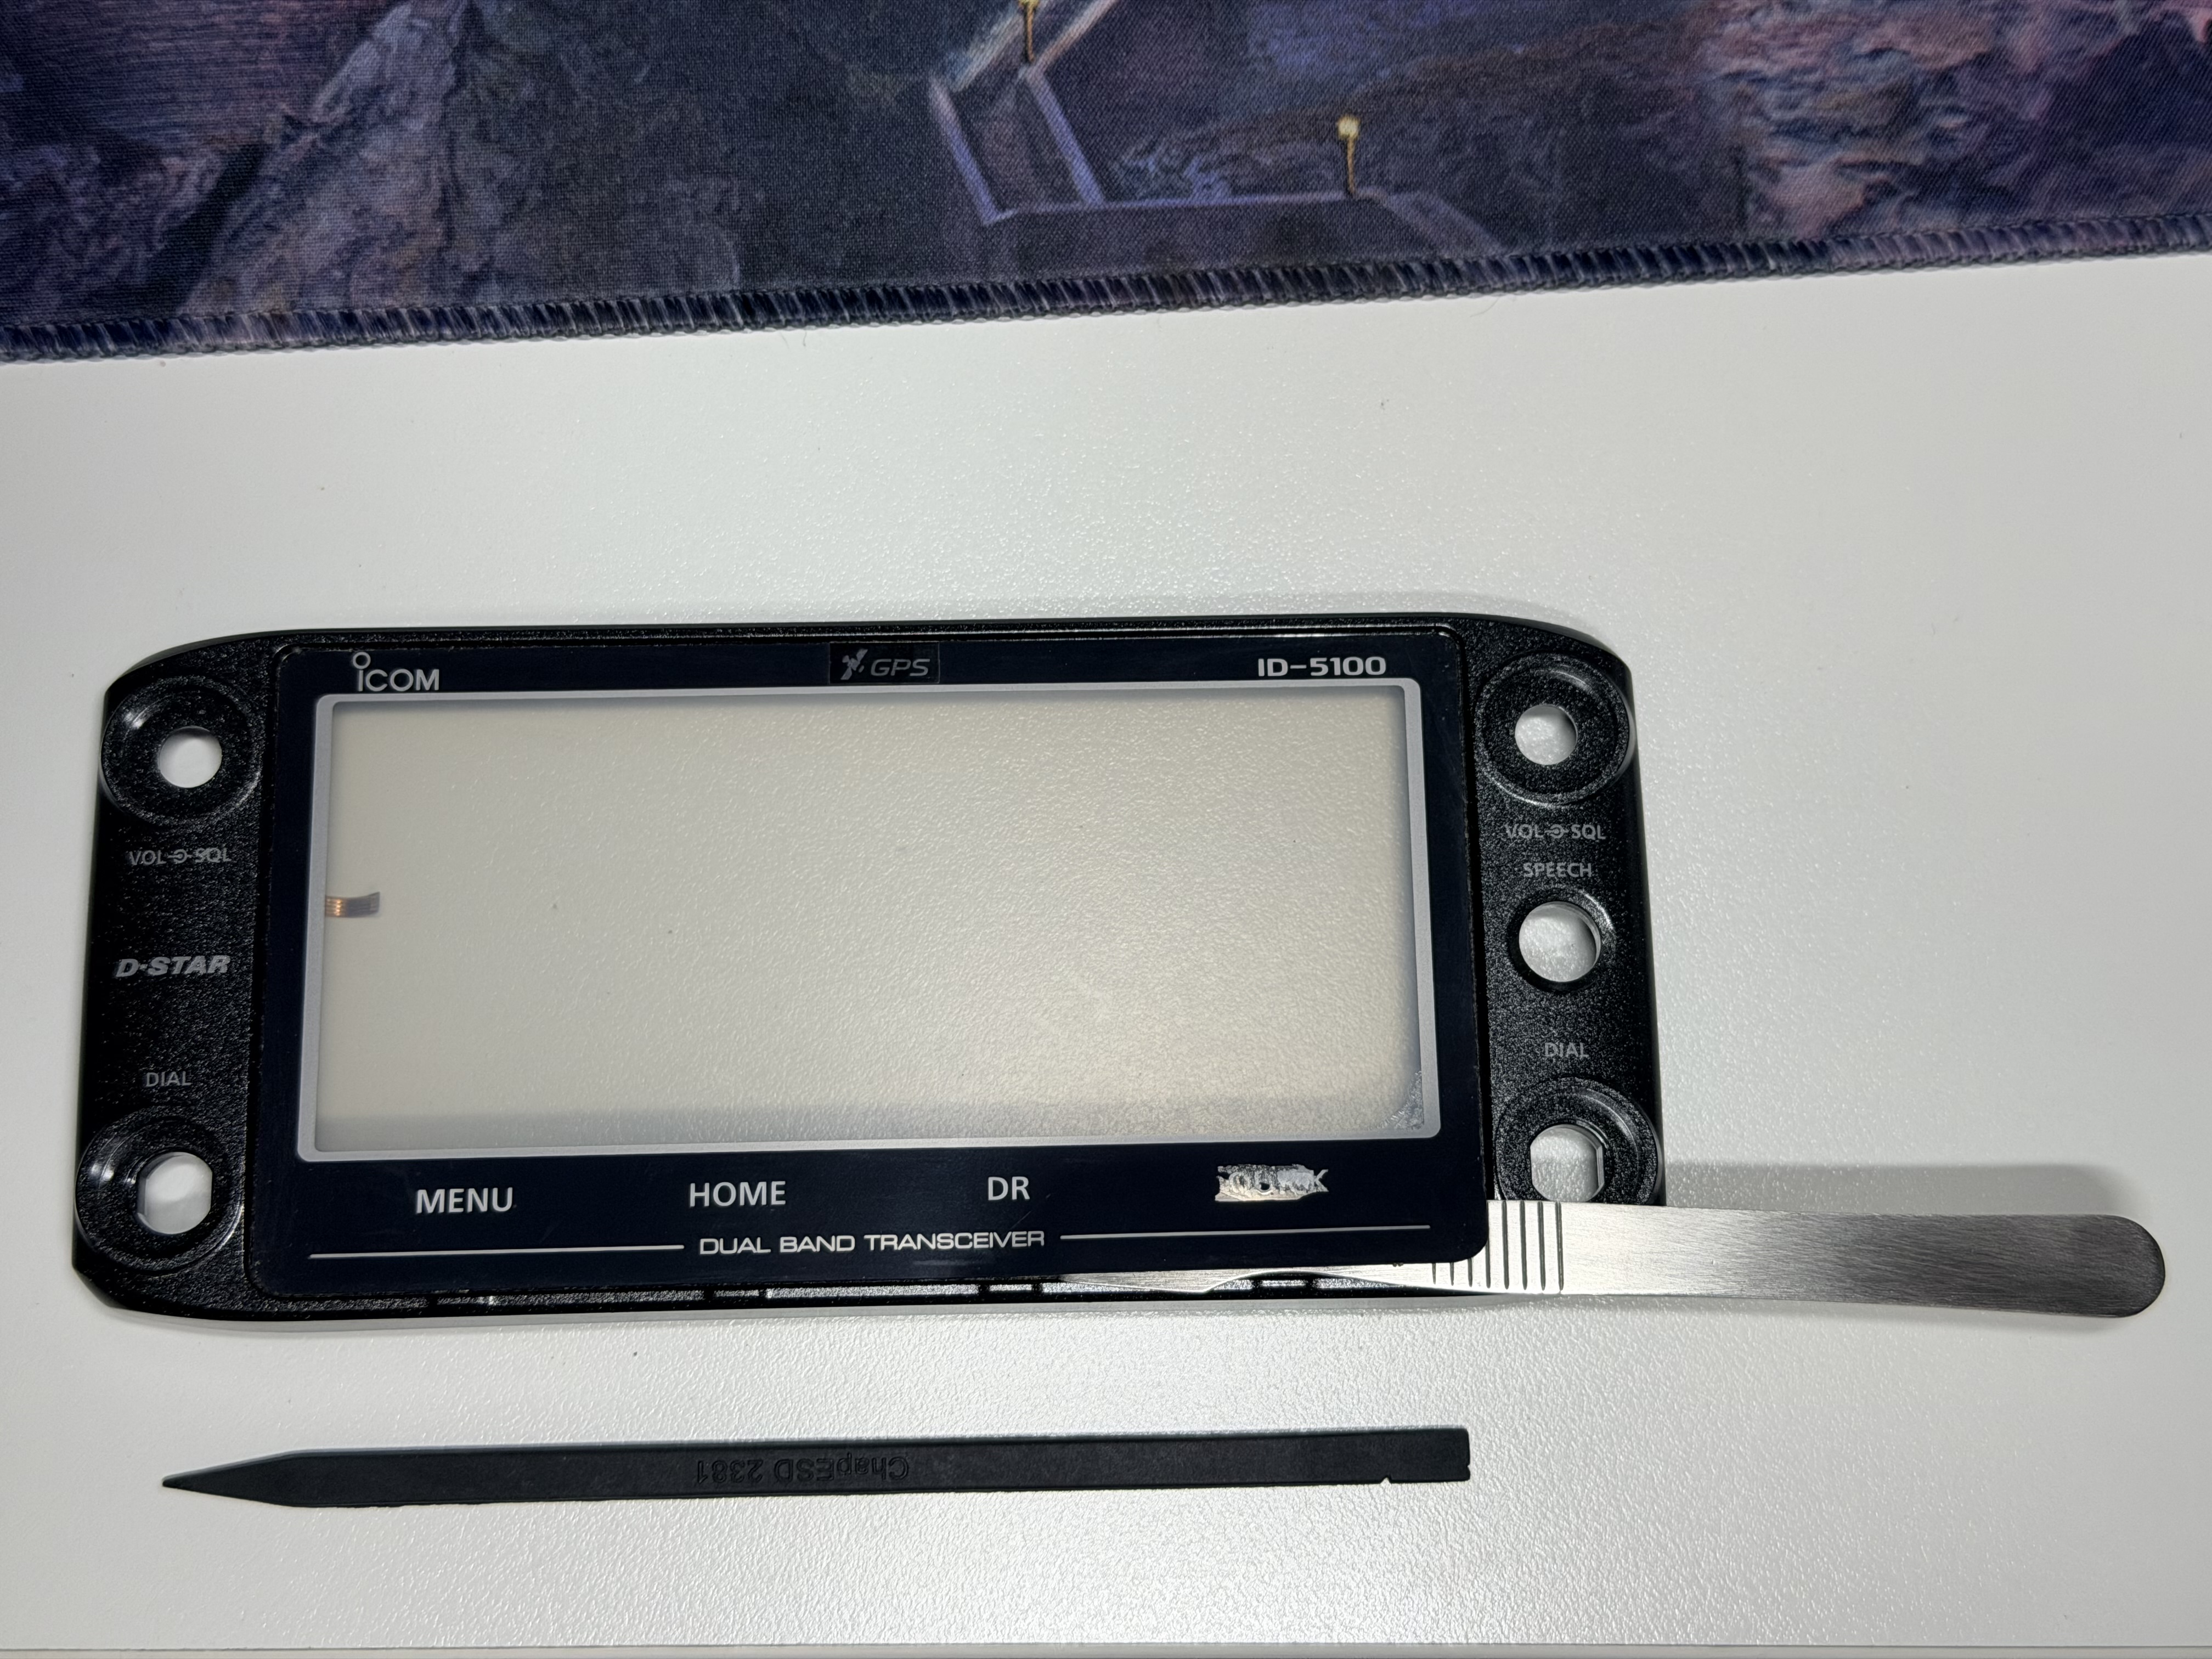
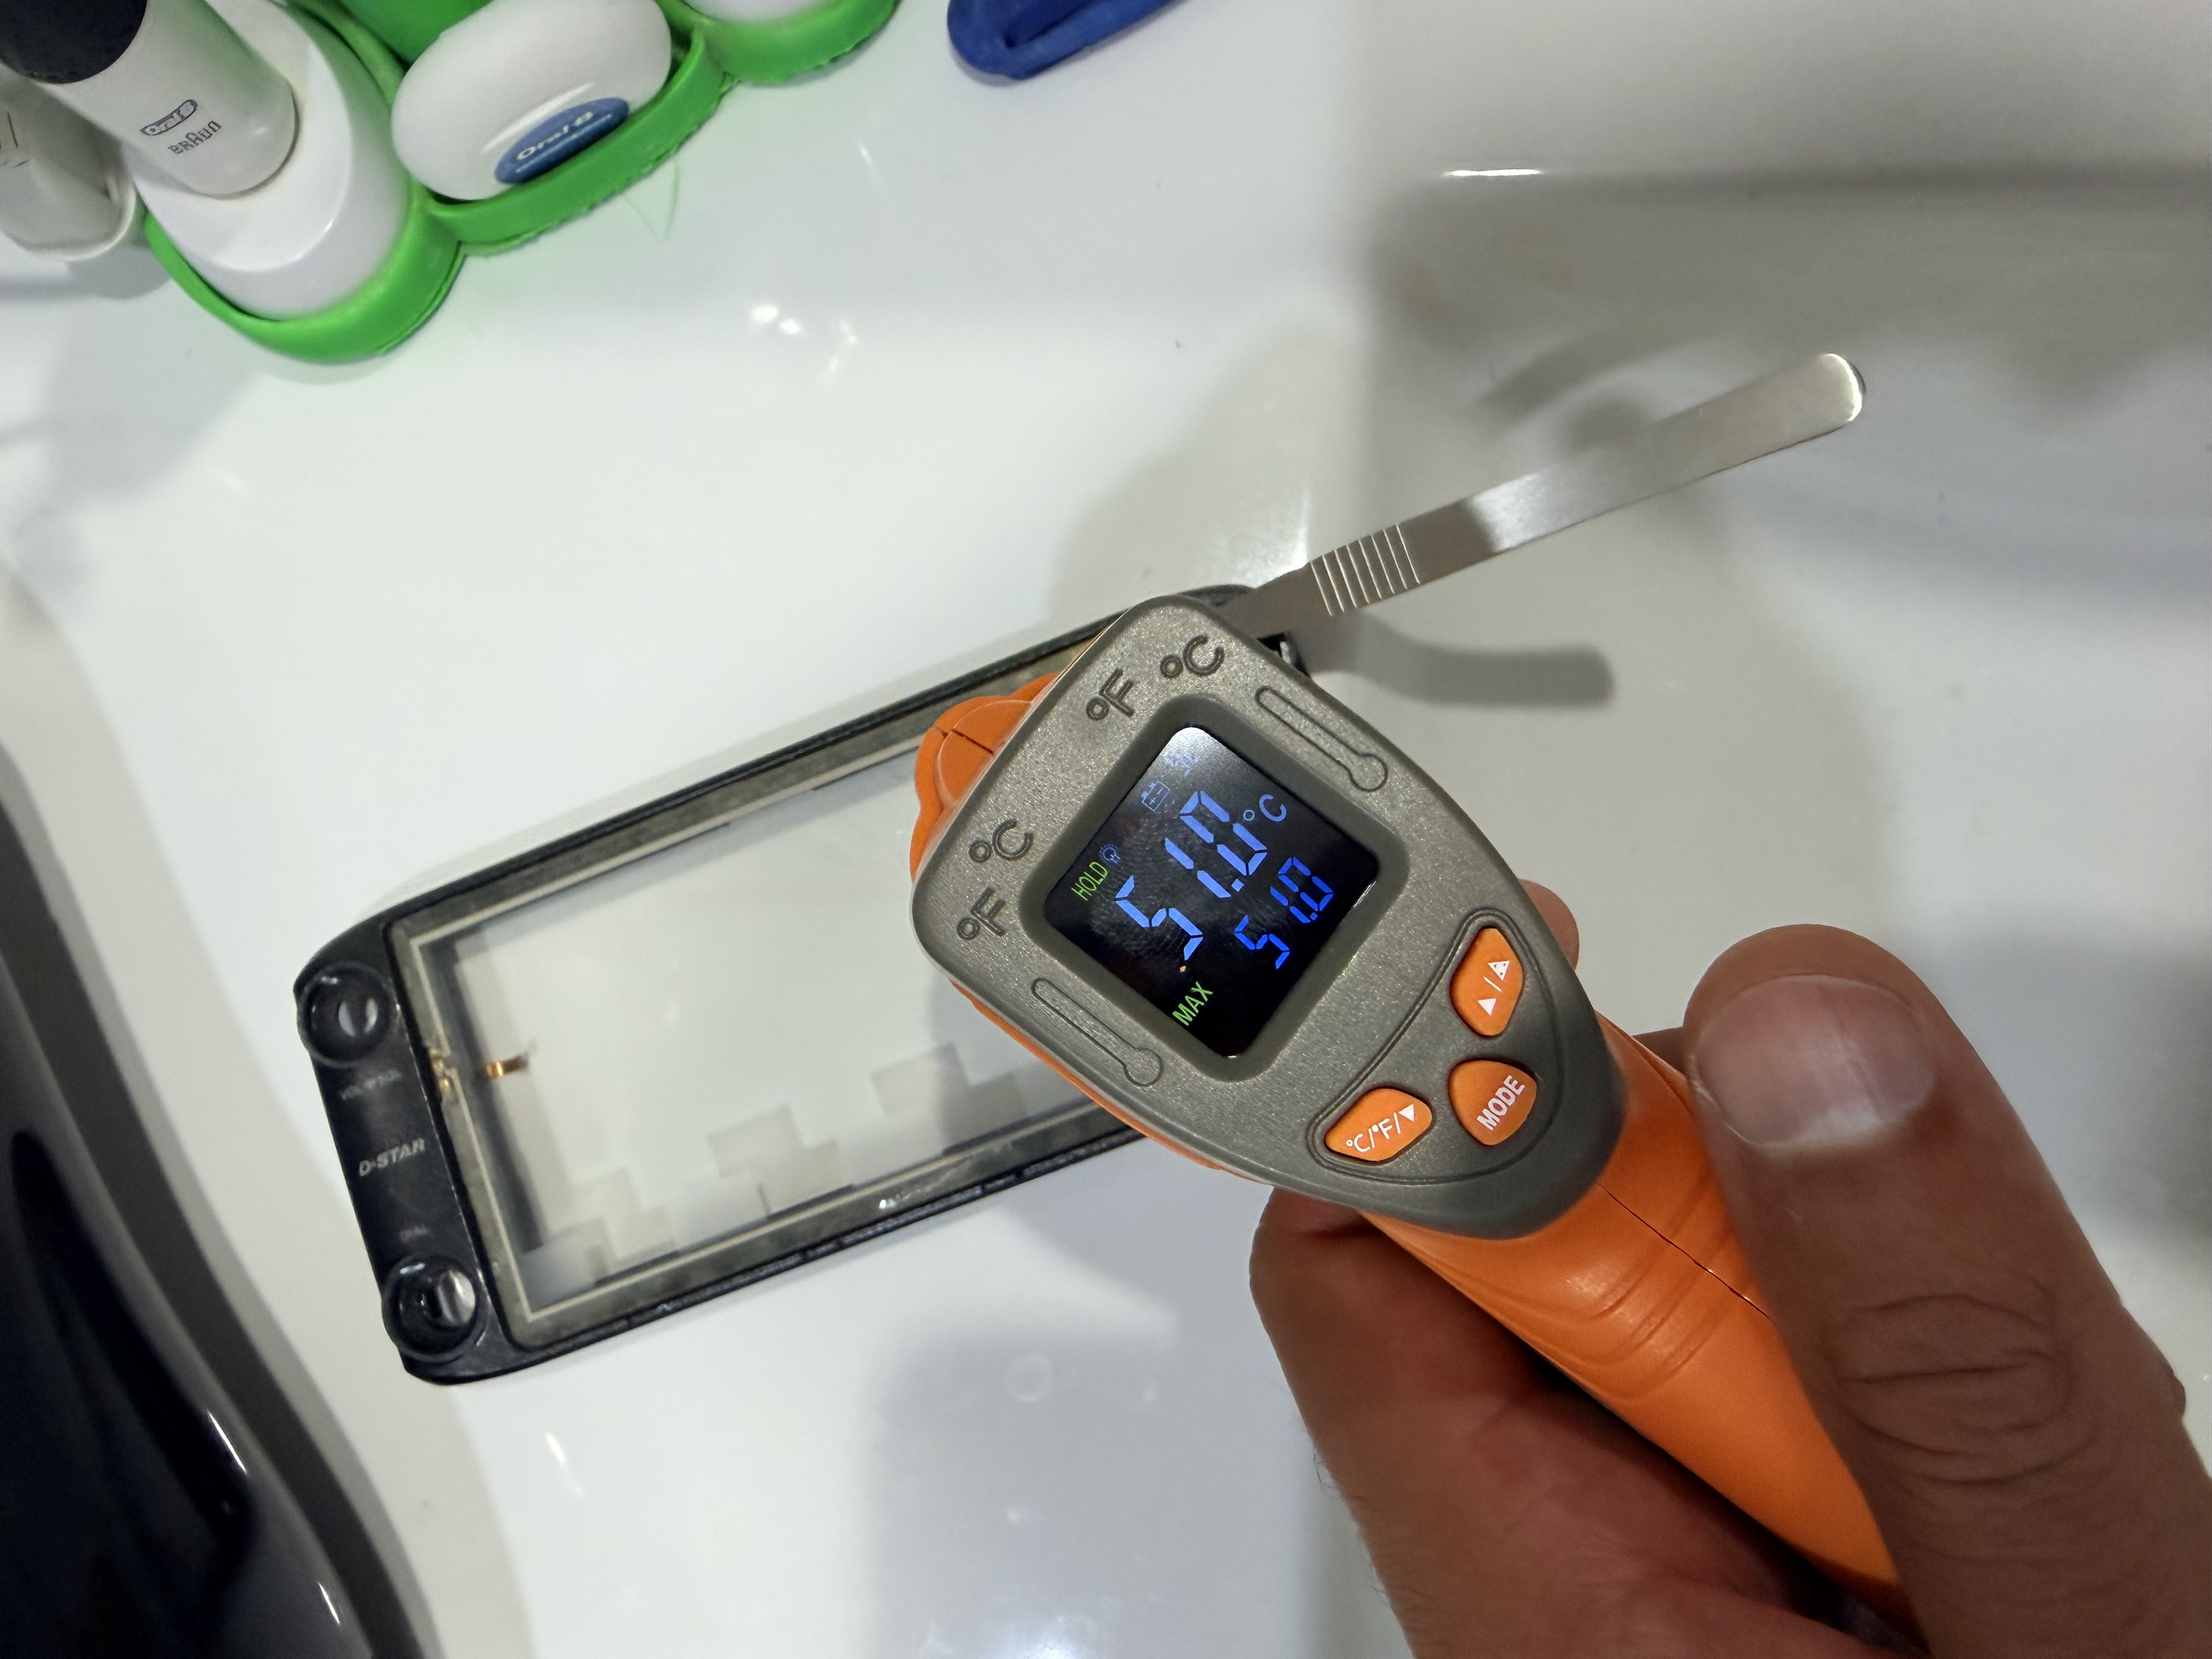
Once the internals were accessible, the next task was separating the damaged front assembly without making things worse.
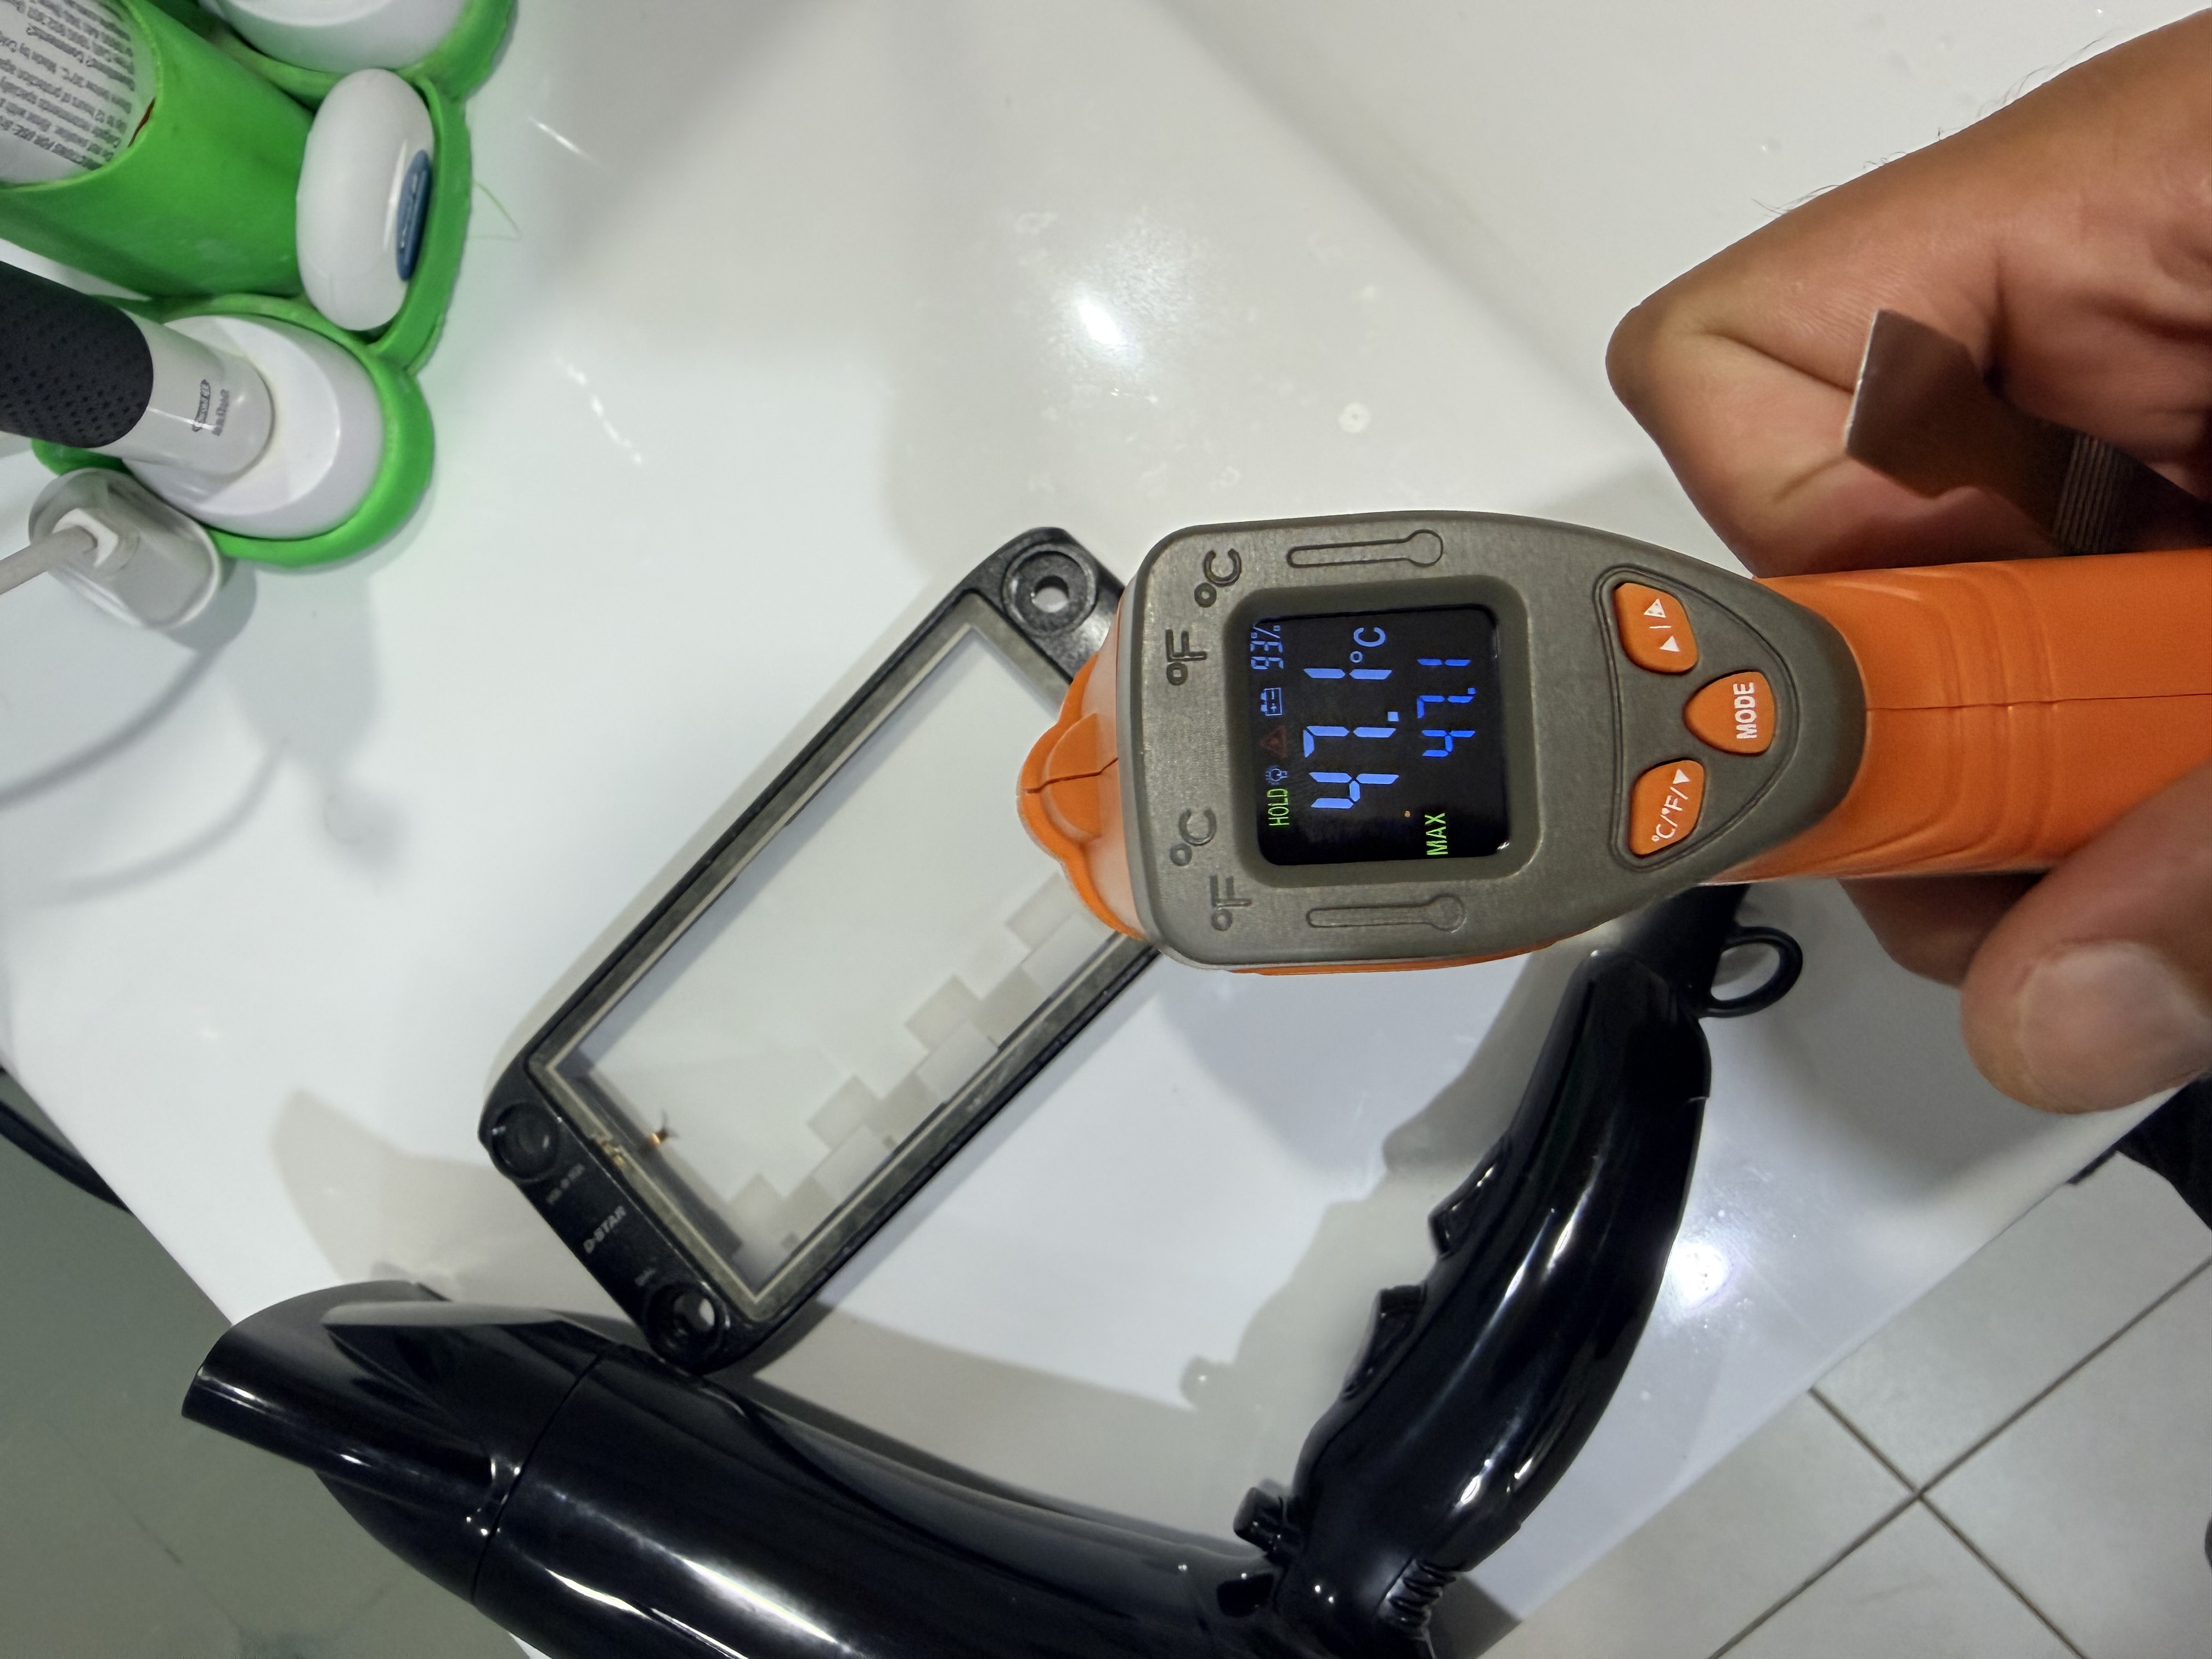
That is where the hair dryer came in.
I warmed the panel enough to soften the adhesive and make the separation manageable. One of my temperature shots shows the front sitting at about 47.1 C, which was about where I wanted it: warm enough to help, nowhere near hot enough to feel reckless. This was not a job for brute force. It was a job for gentle heat, careful leverage, and a refusal to become impatient just because the old adhesive had other plans.
That stage is where most of the risk lives. Not in some obscure electrical trick, but in the usual small disasters: cracked replacement parts, damaged bezels, stressed ribbon tails, fingerprints where you do not want them, and the dawning realisation that “just peel it up carefully” was never going to be a complete instruction manual.
Still, once the adhesive finally gave up, the repair settled down again into a controlled sequence instead of a fight.
Rebuilding the Front
With the damaged parts out, the next step was the sort of work that never sounds dramatic but makes all the difference to the end result: cleaning out the old adhesive, getting the new parts seated properly, routing the tails cleanly, and rebuilding the front stack in the right order.
This is where a repair becomes either “fixed” or “properly put right.”
I did not want the radio merely working. I wanted it to look right, feel right, and go back together without obvious signs that it had spent the evening in pieces on a bench. The ID-5100A controller is a very user-facing part of the radio. If the front panel feels off, you notice it every time you touch it.
So this part got the time it deserved.
Fresh adhesive went in, the replacement LCD and touch screen were fitted, the ribbons were fed back where they belonged, and the board was reinstalled without trying to bully anything into place.
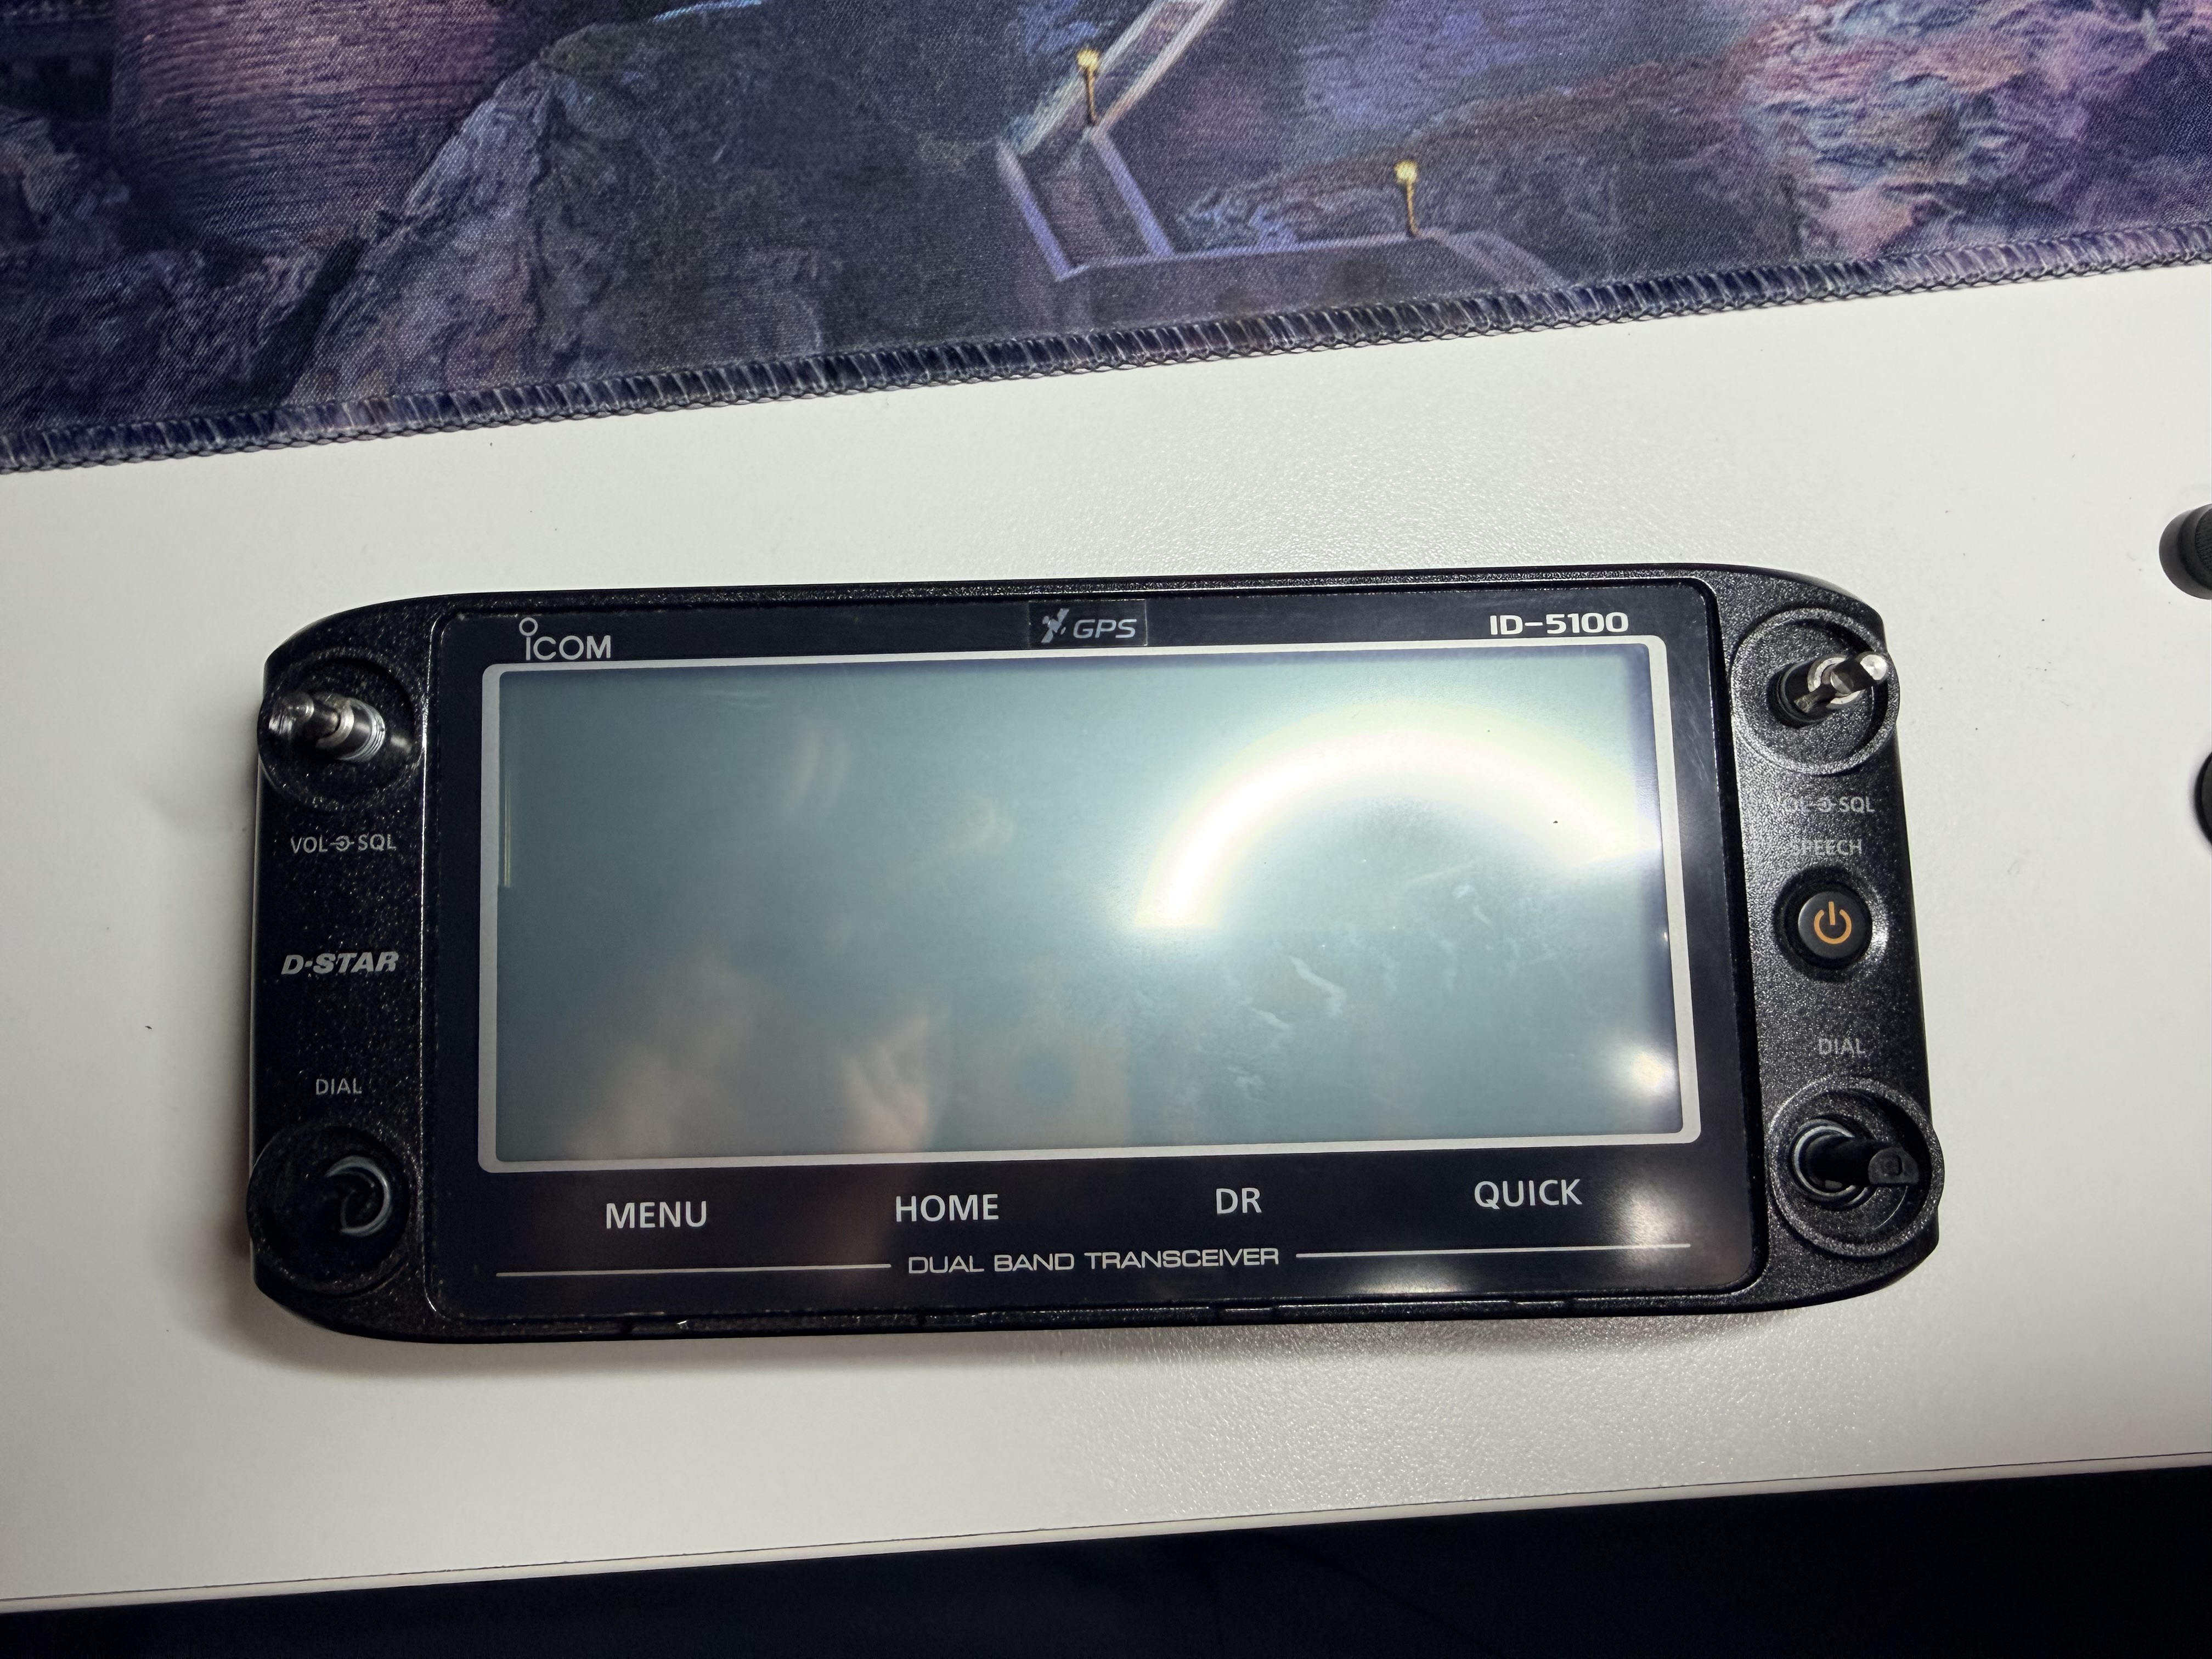
There was also one small absurdity I had not expected: the GPS sticker on the front bezel was not part of the original screen assembly. Icom had applied it afterwards. Which meant that, in addition to replacing the touch screen and LCD, I also had to perform tiny sticker surgery with tweezers to transfer the GPS badge over to the new front. Nothing says “precision electronics repair” quite like carefully transplanting a decorative sticker so the patient does not lose its identity.
GPS badge that needed its own transplant.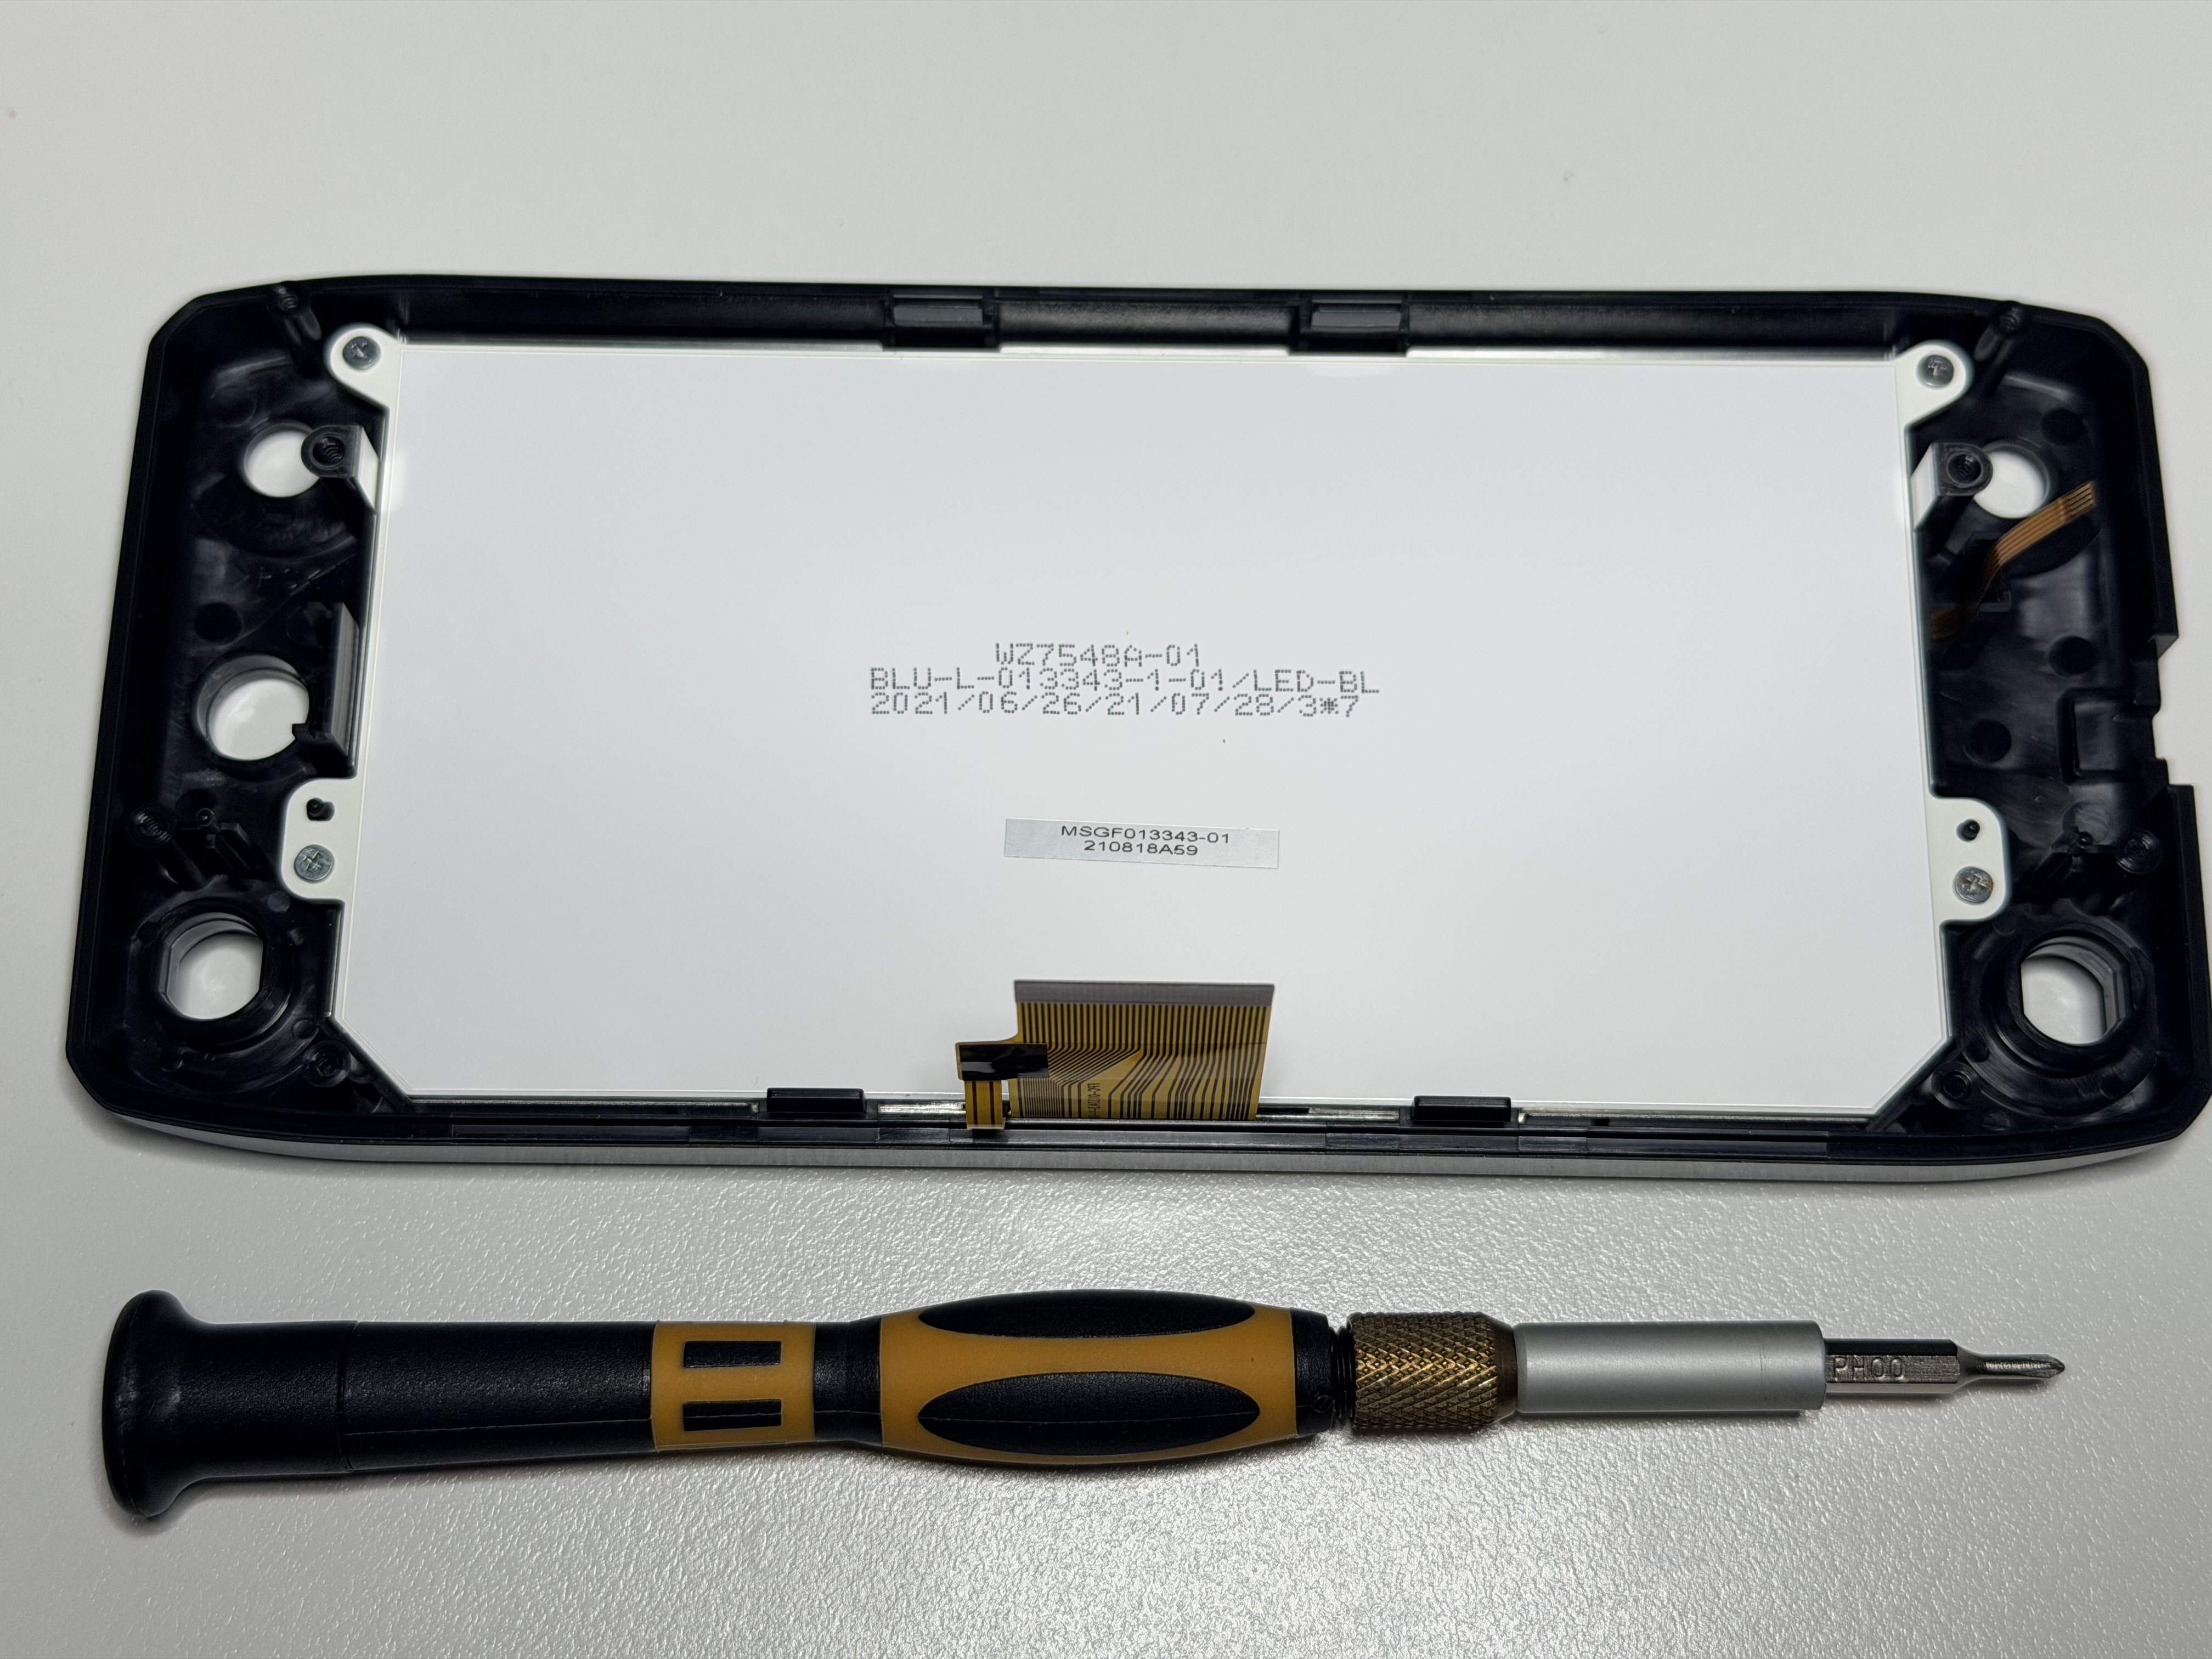
Closing It Up
After that it was just the usual process of reassembly: reconnect the ribbons, reseat the board, close the shell, reinstall the screws, and refit the knobs without launching any small part into low Earth orbit.
None of that was conceptually difficult. All of it was capable of becoming annoying if rushed.
Fortunately, it all went back together the way it should.
The Moment of Truth
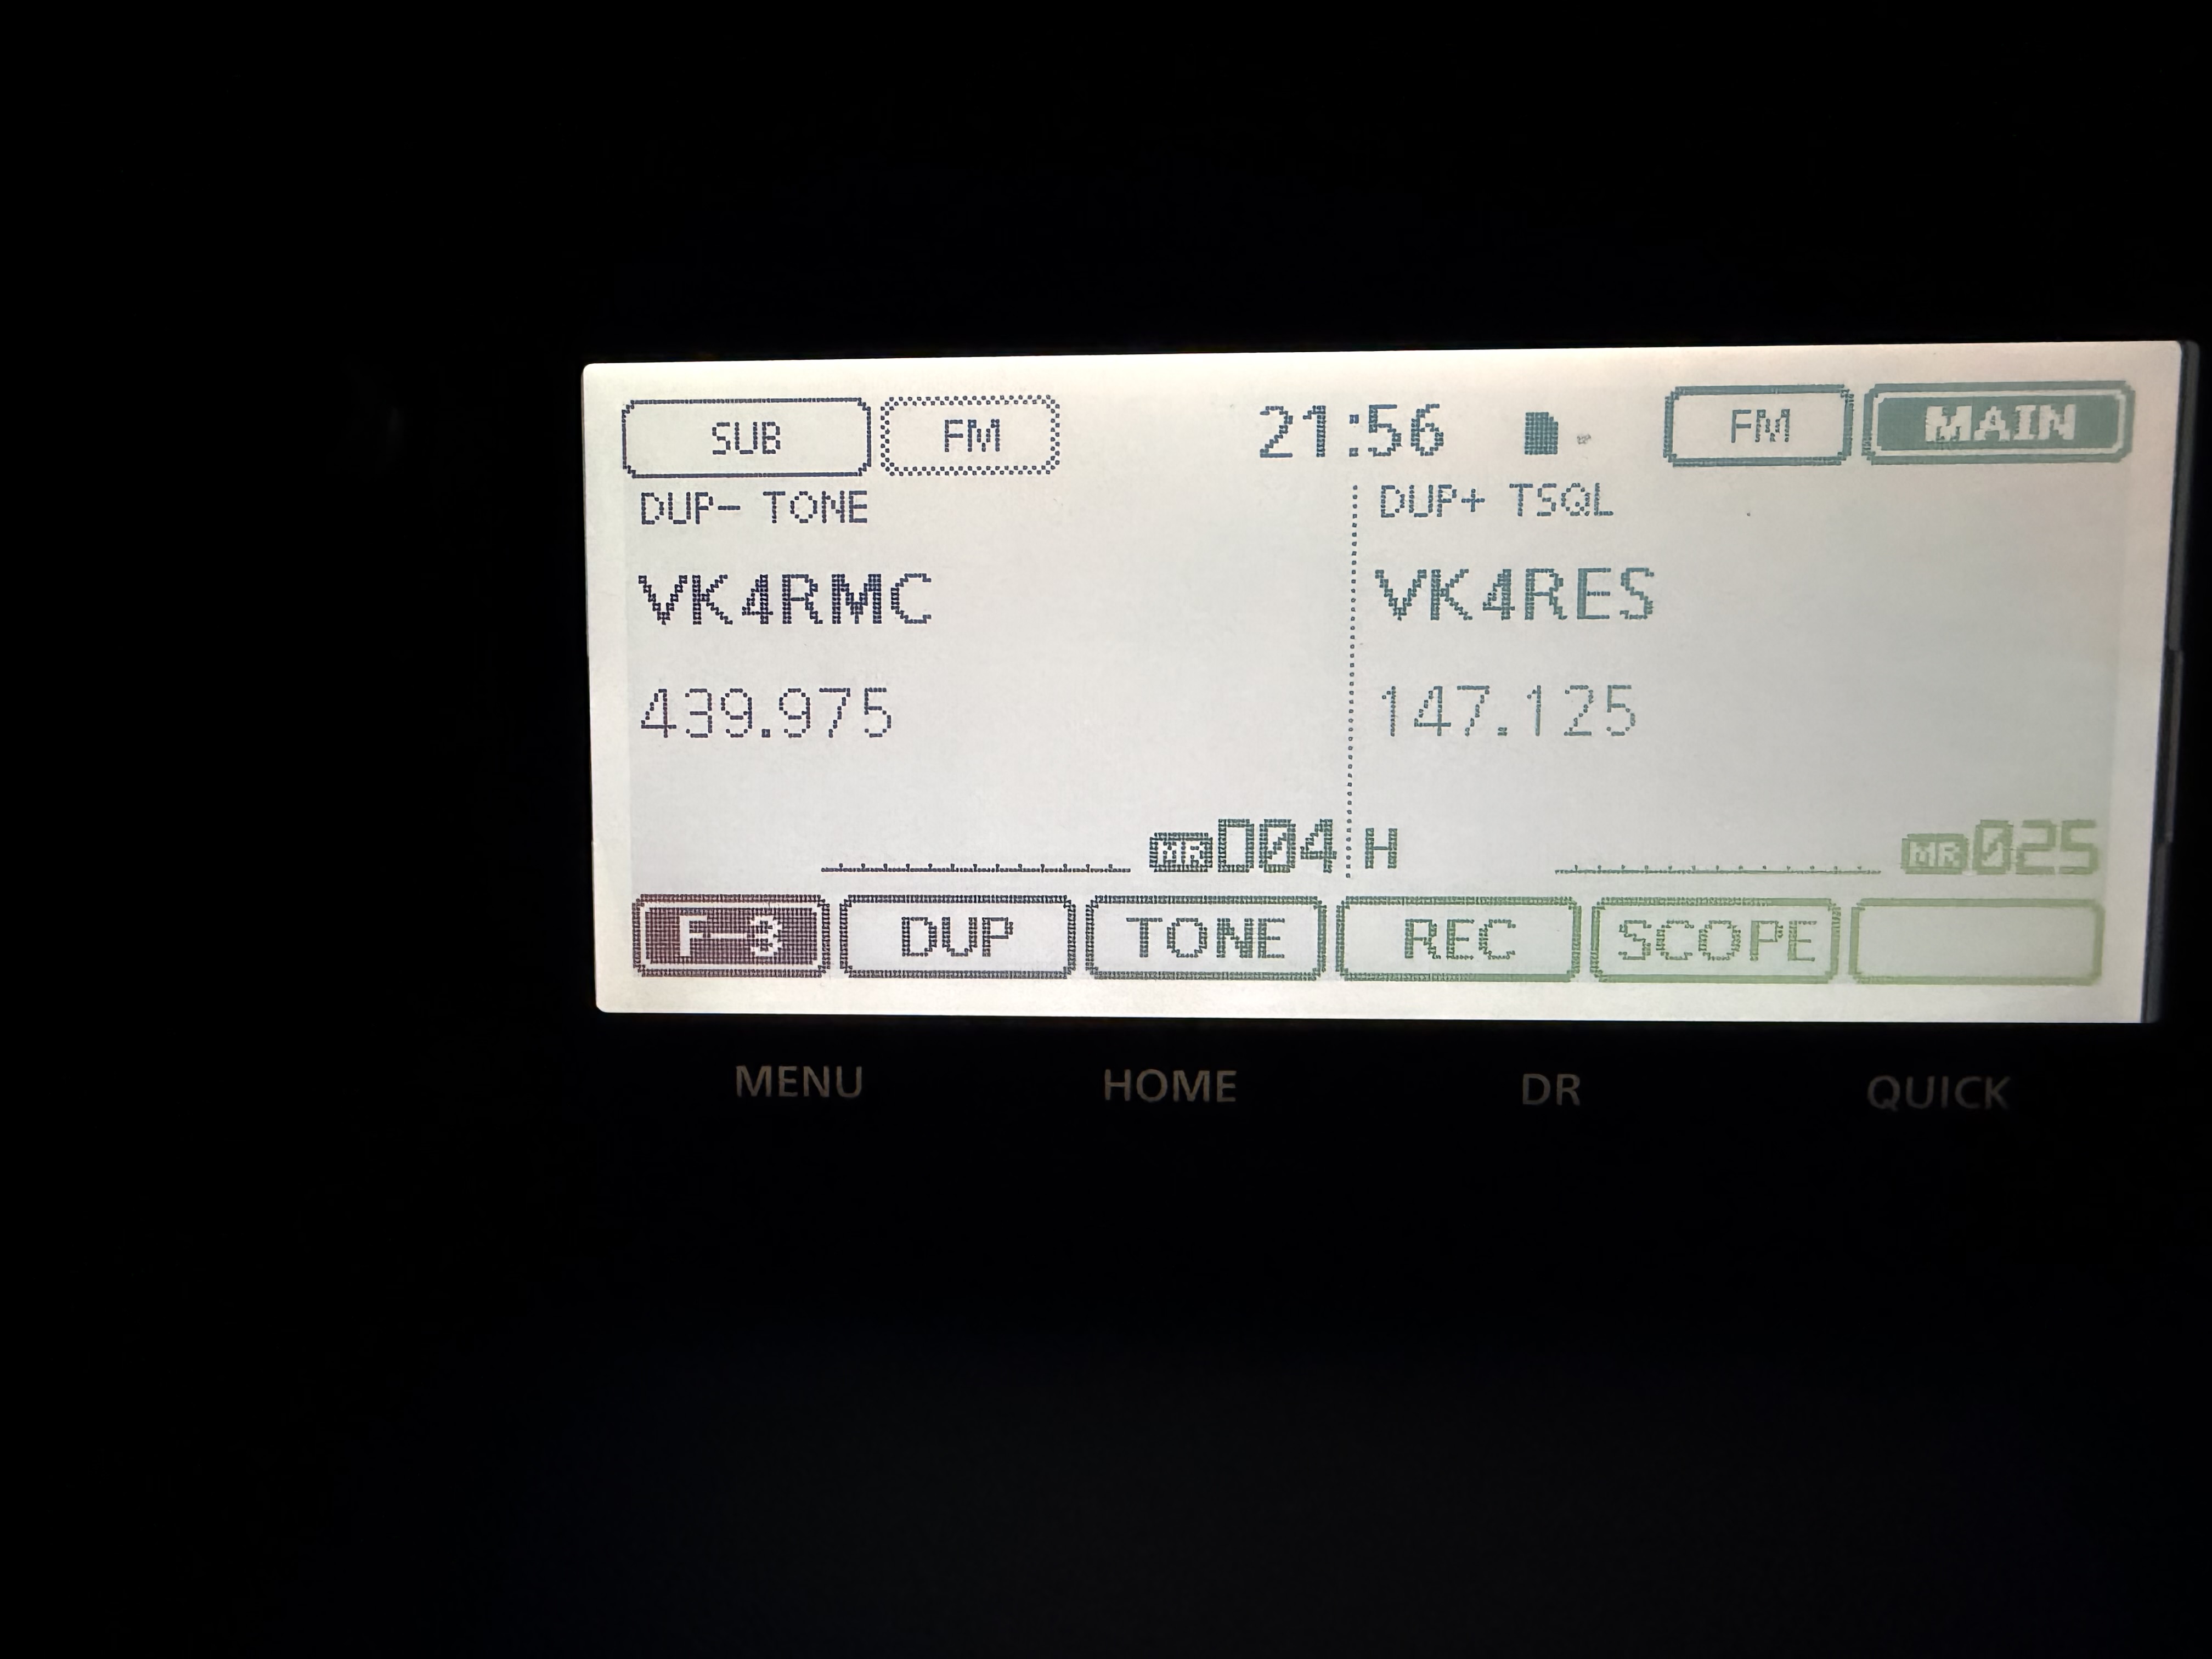
The payoff shot made the whole exercise worthwhile.
Screen alive. Front panel clean. Radio working. No horrible surprises.
And that is where this stopped being a neat repair anecdote and became a genuinely useful recovery of good gear. The end result was not just a cosmetically improved radio. It was a fully functional ID-5100A ready to do the job I actually wanted it for.
That matters, because this radio is not being rescued for shelf decoration. It is going back into service as a capable dual-band mobile with the features that make the ID-5100A worth having in the first place: the big touch display, GPS in the controller, strong mobile ergonomics, and the kind of operating flexibility that still makes it attractive for amateur work.
It is much more satisfying fixing something when it is going straight back into real use.
What I Took Away From It
The repair was worthwhile for three reasons.
First, the purchase price was right.
Second, Icom Australia made the parts easy to get and were excellent to deal with. That deserves repeating, because it is the difference between repairability as marketing language and repairability as something that actually exists in the real world.
Third, the repair itself stayed on the right side of complexity. It needed care, but not exotic tools, board-level rework, or an engineering seance. If you are comfortable opening equipment, dealing with small screws and ribbon cables, and applying heat with a bit of restraint, this is a very manageable sort of broken.
And there is something especially satisfying about the kind of repair that does not require heroics. No sacrificial donor unit. No unobtainium parts. No grim forum thread from 2017 ending with “never mind, bought a new one.” Just parts, patience, a couple of screwdrivers, some spudgers, my XYL’s hair dryer, and a radio that came back to life.
That is my favourite kind of repair.
Final Thought
If you come across a busted-screen ID-5100A cheaply enough, I would not write it off immediately.
If the rest of the unit is sound, and if you can still source the parts, it is a very salvageable kind of broken. In my case, that turned an A$350 damaged radio into a properly useful one again, and I ended up with exactly what I was hoping for: a fully functional satellite radio, bought cheaply, repaired properly, and back on the air.
Of course, now that the head unit has had surgery and lived to tell the tale, the obvious next item on the list is base unit surgery. Time to crack open the other half and install a UT-133A Bluetooth unit. Because apparently the correct response to one successful radio operation is to schedule another one immediately.