
Projects / Camera driver
OpenStarShoot: Teaching an old CCD camera some new tricks
Reverse-engineering an Orion StarShoot Mono III, figuring out its USB protocol and building an open-source Linux driver.
On this page
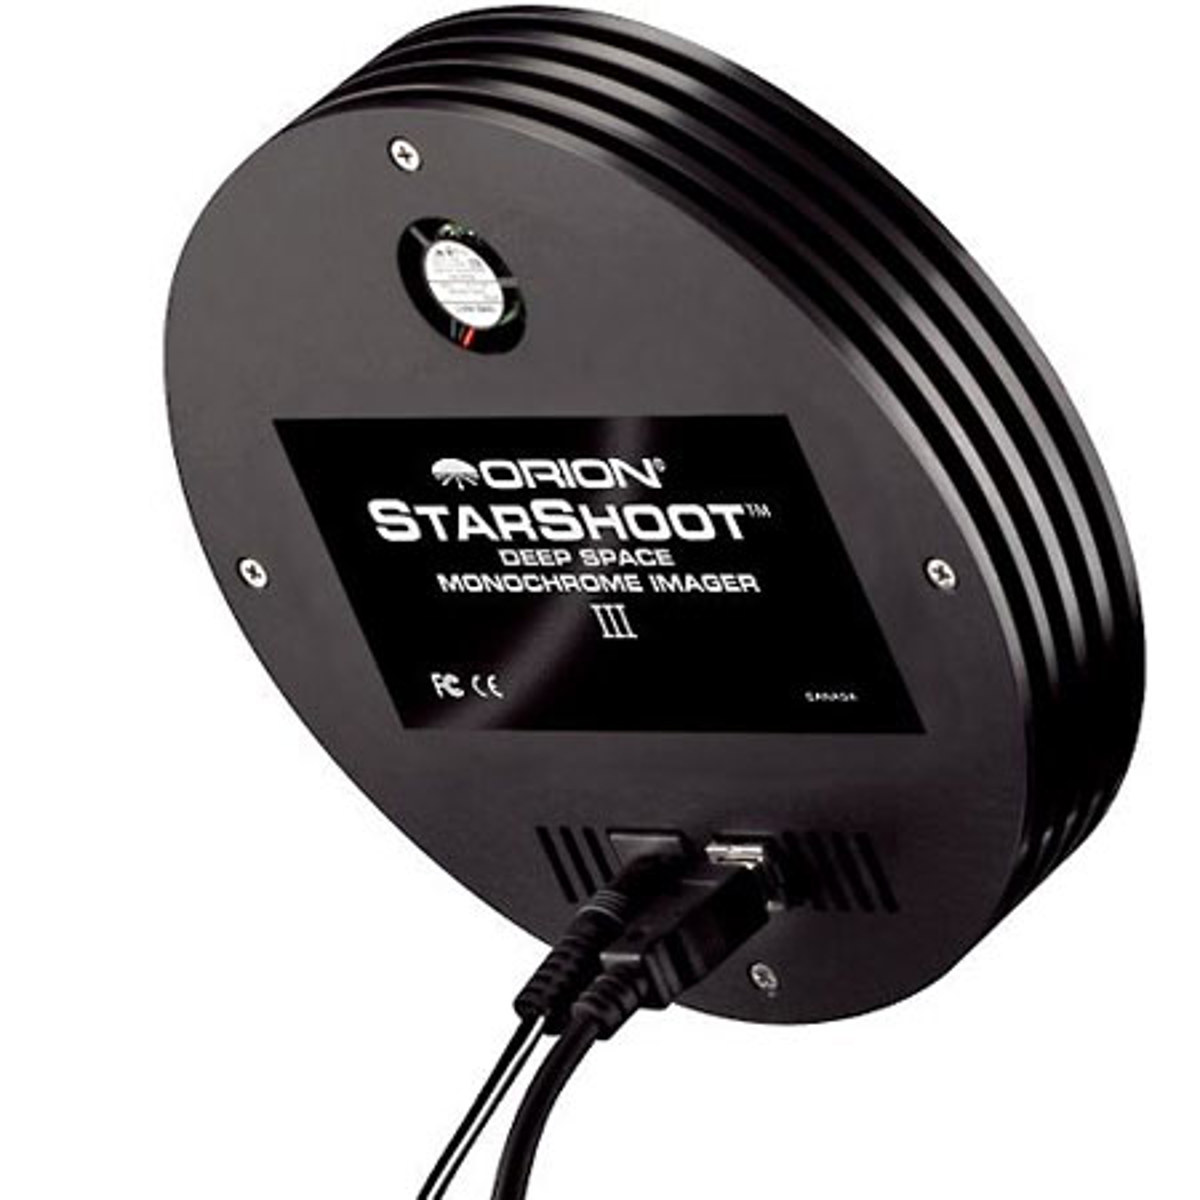
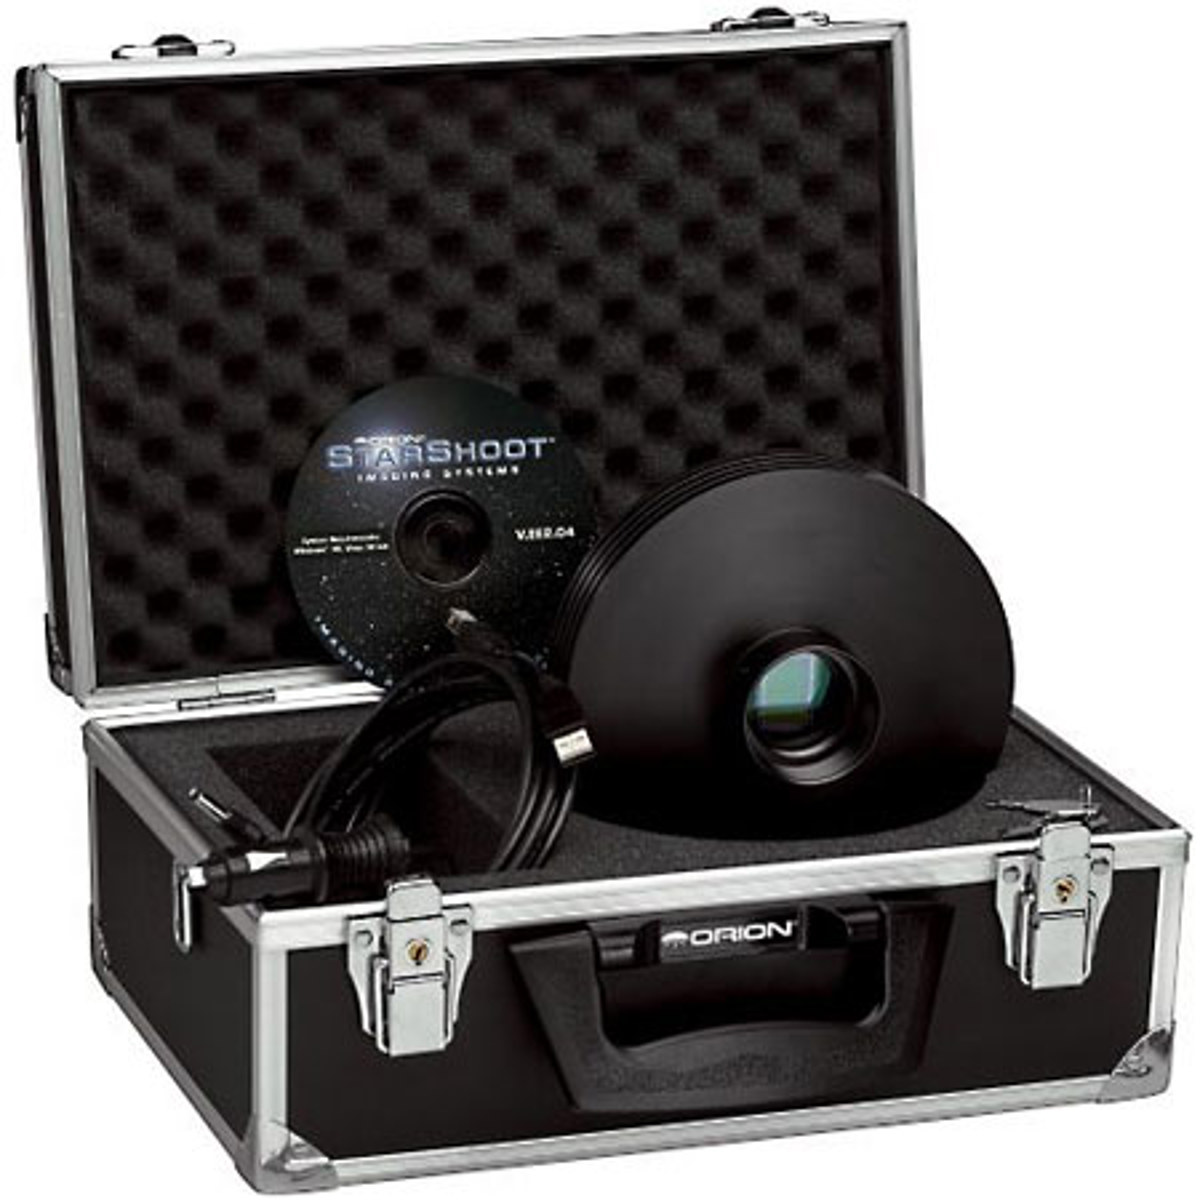
My friend Renato, VK4TNT, gave me an Orion StarShoot Deep Space Monochrome Imager III, along with its original Windows drivers. It’s a monochrome CCD astronomy camera from around 2009, model #52076, and although the camera itself still works, the software that came with it is very much a product of its time.
Now, I enjoy a good bit of older technology, particularly when there’s something interesting to learn from it. But I wasn’t especially enthusiastic about having to maintain an old Windows installation just to operate a camera. Renato had kept the original drivers, though, and that presented a much more interesting possibility. Could I work out how the camera communicated with its software and write something that would allow it to work on a modern Linux system?
Most of my astrophotography these days runs through a ZWO ASIAIR, which handles my imaging equipment rather nicely. I wasn’t looking to replace that setup. However, ASIAIR is a fairly closed environment, and trying to get an unsupported camera working within it seemed a poor place to begin. INDI and KStars/Ekos made considerably more sense. They’re open-source, already support a wide variety of astronomical equipment, and would give me a useful way to operate the camera once I’d figured out its communication protocol.
Of course, that last bit was rather important. The camera didn’t come with a Linux driver or a convenient document explaining how to talk to it.
And so began OpenStarShoot.
I’ve been involved in photography for much of my life, beginning with film cameras such as the wonderfully mechanical Zenit 12XP before eventually moving into digital photography and astrophotography. My first dedicated astronomy camera was a ZWO ASI224MC, which I bought in 2018. Since then I’ve used the ASI533MC and ASI2600MC, with the latter becoming my main imaging camera, and I added an ASI290MM Mini for guiding in 2023.
Every one of those astronomy cameras uses a CMOS sensor. So, despite having spent years photographing the night sky, I’d never actually owned an astronomical CCD.
I was rather pleased to finally have one to play with.
CCDs have an interesting history in astronomy. For decades, their sensitivity, uniformity and noise characteristics made them particularly well suited to scientific imaging, and they dominated much of professional and amateur digital astronomy. CMOS technology has since developed enormously, to the point where modern scientific CMOS sensors can outperform older CCD designs in many applications. They also offer advantages in power consumption, readout speed and flexibility.
The underlying differences are fascinating. A conventional CCD collects photoelectrons during an exposure, then transfers that accumulated charge through the sensor’s readout structure before converting it into an electrical signal. CMOS sensors generally perform charge-to-voltage conversion much closer to the individual pixels, with readout circuitry integrated into the sensor itself. There are numerous variations on both designs, of course, but those differences influence everything from how quickly images can be read to the electronics required to control the sensor.
Having used CMOS cameras for years, I was curious about what was going on inside the Orion. More specifically, I wanted to understand how its controller managed exposure and readout, and how that information eventually became an image on the computer.
Fortunately, I had both the hardware and its original software to investigate.
Learning to speak the camera’s language
The original Windows software was where I started digging.
There were three files of particular interest: CCDPlugStarShoot2.dll, StarShoot2_32.sys and StarShoot2_64.sys. The two .sys files provided the Windows USB transport, while the DLL contained much of the logic specific to the camera, including how commands were constructed and how the returned image data was handled.
I began examining these binaries to identify the commands being sent, the order in which they were issued and what the software expected the camera to return. This involved working backwards from compiled code, which isn’t quite as pleasant as having the original source available, but there was enough information in the binaries to start reconstructing the protocol.
The camera identifies over USB with vendor ID 0x1856 and product ID 0x001E. It uses USB 2.0 high-speed communication, with bulk endpoint 0x08 carrying commands to the camera and endpoint 0x82 returning responses and image data.
With those details established, I could use libusb to communicate with the hardware directly.
The protocol turned out to be fairly compact. Most commands consist of six bytes: a fixed 0xA5 header, an opcode identifying the command, and four parameters whose meanings depend on the operation being requested.
A5 OP P0 P1 P2 P3Ordinary responses are eight bytes long.
One of the first things I managed successfully was this identification command:
HOST → CAMERA
A5 01 00 00 00 00

CAMERA → HOST
A5 00 01 00 05 00 00 00
That first 0x01 tells the camera that we’re asking it to identify itself, while the response confirms the profile-5 sensor path.
Six bytes out, eight bytes back. Very satisfying!
It wasn’t much of a conversation at that point, admittedly, but it confirmed that I’d identified the correct USB interface and endpoints, and that the camera was responding to commands sent without its original Windows software. From there, I could start working through the other operations.
The next challenge was figuring out how to ask the camera to do something useful, such as take an exposure.
The original DLL contained enough information to recover the main commands, including identification, status queries, exposure configuration, image readout, stopping acquisition, selecting the readout window and controlling the cooler and fan. I’ve documented the recovered opcodes in the technical notes, along with the command formats and expected responses.
Identifying those commands was only part of the problem, though. The four parameter bytes could mean different things depending on the opcode, and sending the right command at the wrong point in the acquisition sequence wasn’t going to be especially helpful.
For instance, here’s a command configuring a nominal 100 ms exposure at readout speed 5 with 1×1 binning:
A5 03 06 00 64 03Changing the readout mode from 0x03 to 0x07 requests the same exposure with 2×2 binning:
A5 03 06 00 64 07To acquire an image, the driver needs to prepare the camera, configure the readout window and start the exposure. It then polls the camera’s status until the exposure is complete, initiates image readout, collects the expected amount of data, and finally tells the camera to stop before checking that it’s returned to idle.
There were also some interesting distinctions at the USB transport level. The camera advertises a maximum bulk packet size of 512 bytes, but OpenStarShoot normally requests image data in 1024-byte chunks through libusb. That’s perfectly reasonable because the USB packet size and the amount of data requested by the application are different things. Still, it’s the sort of detail that matters when you’re trying to understand exactly what a device is doing.
By this stage I had a basic means of communicating with the camera and could begin acquiring image data. The next question was what to do with it.
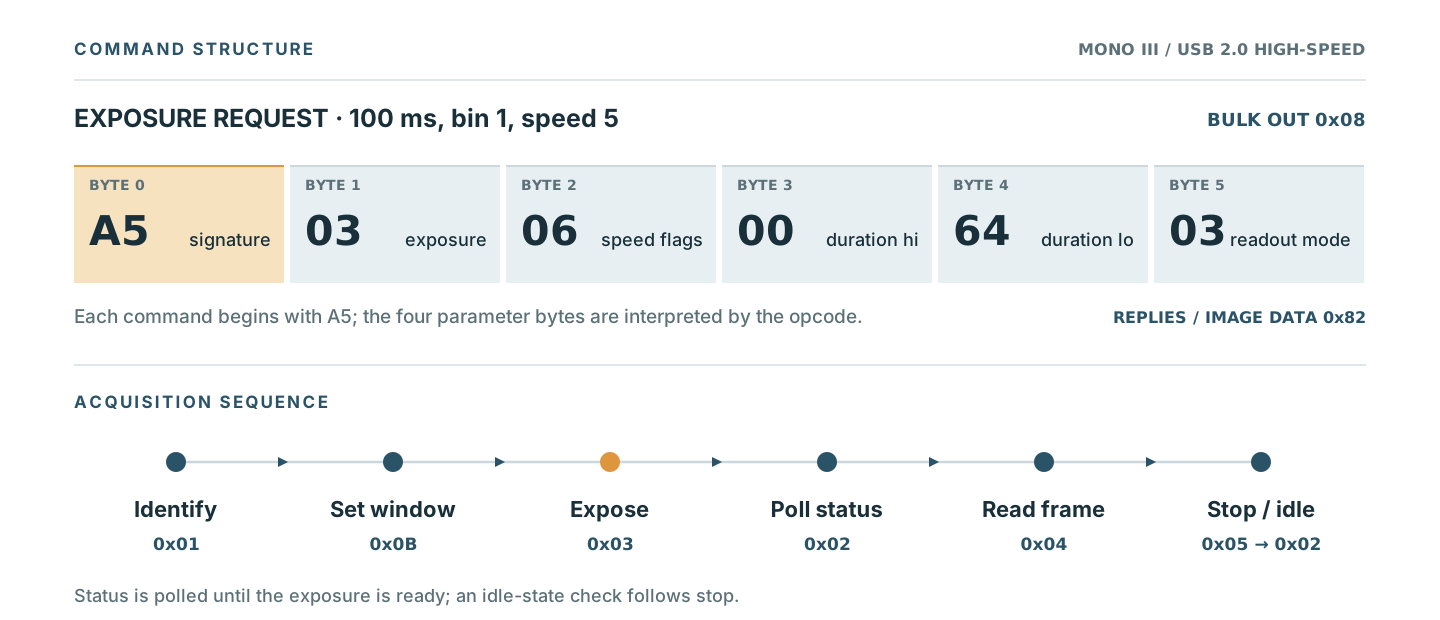
The six-byte command structure and the camera acquisition sequence.
Making sense of the pixels
The Orion has an active sensor area of 1392 × 1040 pixels. That’s the image size you’d expect from an ordinary full-frame exposure at 1×1 binning.
Naturally, that’s not quite what the camera sends back.
An unbinned full-frame acquisition actually returns a raster measuring 1434 × 1052 pixels. Those additional rows and columns belong to the sensor’s raw readout layout, and the driver needs to understand where the active image sits within it.
The information was there in the original driver, although recovering and reproducing it was another matter. For an unbinned full-frame exposure, the active image begins at raw row 12 and column 31. The reconstruction therefore discards the first 12 rows, 31 columns on the left and 11 on the right, and extracts the expected 1392 × 1040 active image.
That part was reasonably straightforward once I’d established the correct offsets. Binning, however, introduced another set of complications.
With 2×2 binning, the camera performs its own binned readout. It doesn’t simply return the original full-resolution image and leave the software to average groups of four pixels. The raw raster changes to 1434 × 532 pixels, and reconstructing the active 696 × 520 image requires a different interpretation of the data.
The reconstruction uses a different row offset and selects alternating columns from the raw data. The relevant pixel values are also masked to account for the layout of the camera’s binned output.
The result is that image reconstruction needs to understand the acquisition mode. Simply treating every response as a rectangular array of ordinary 16-bit pixels won’t work.
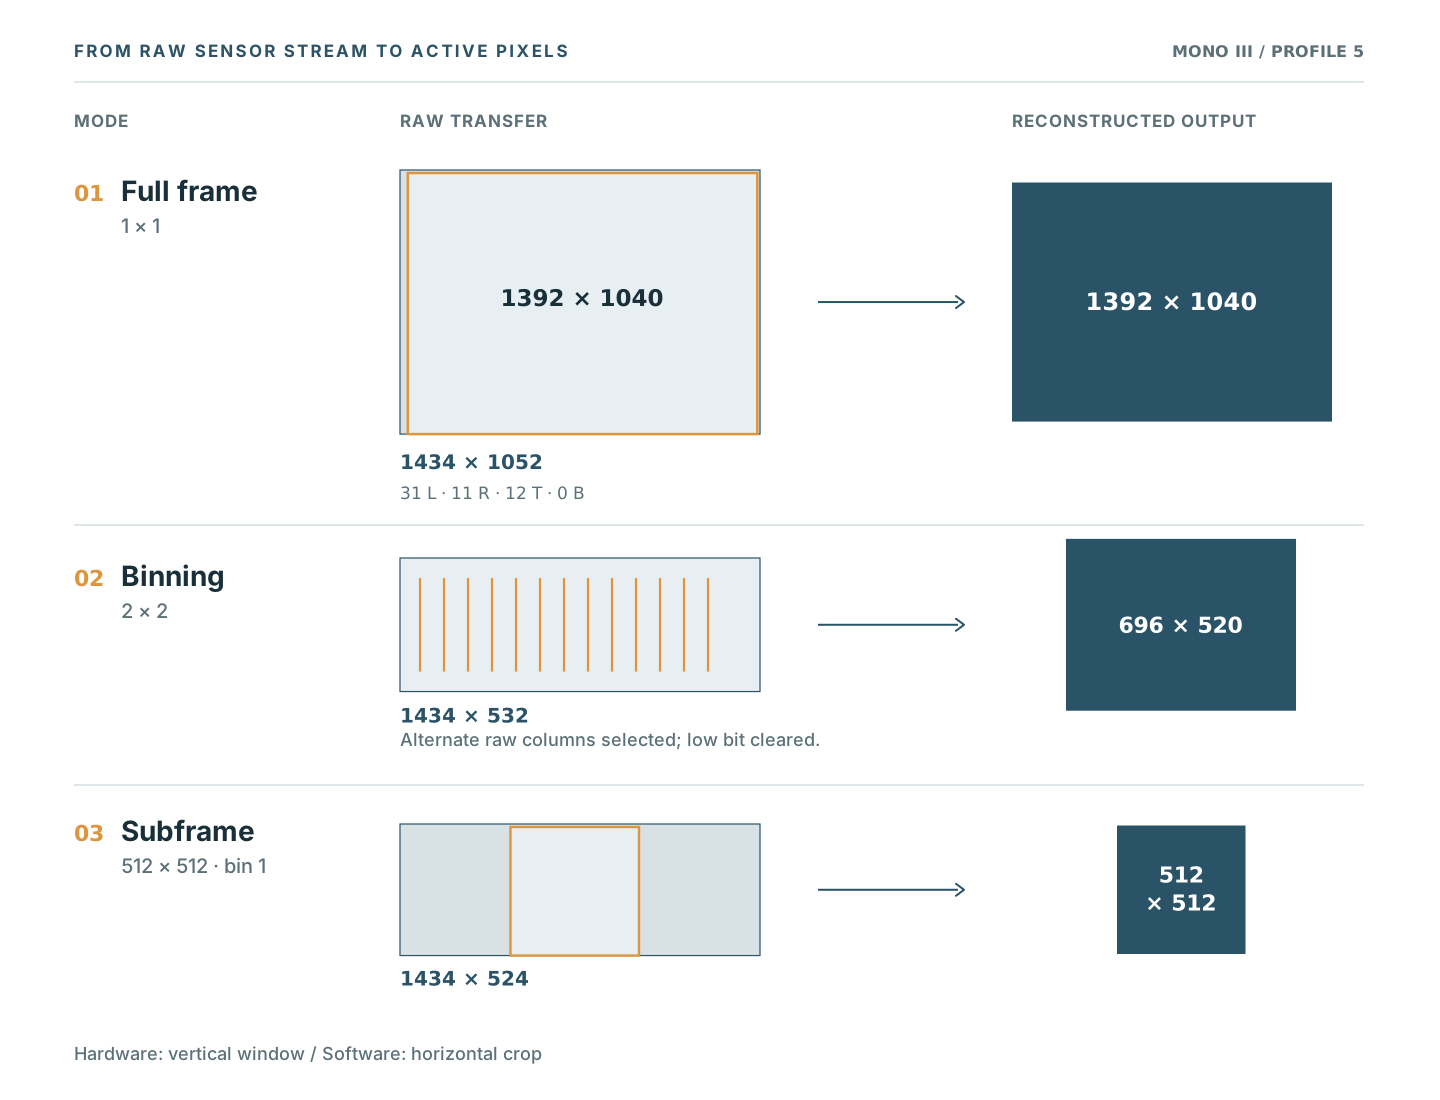
Raw CCD readout dimensions and the corresponding active images in different acquisition modes.
I also wanted the driver to support smaller regions of interest, or ROIs, rather than always having to read the entire sensor. That’s useful for imaging smaller targets, and it’s something I’d expect to be able to control through Ekos.
The Orion handles ROIs in a slightly peculiar way. You can specify a smaller horizontal region, but the camera still transfers the complete 1434-pixel width of each raw row. The vertical readout window does change, so requesting a shorter region reduces the number of rows returned, but not the number of pixels in each raw row.
That distinction matters when calculating the expected transfer size and reconstructing the requested image.
I wanted the native library, command-line tools and INDI driver to use a consistent coordinate system, so OpenStarShoot expresses all ROI coordinates in unbinned active-sensor pixels.
For example, requesting a 512 × 512 region beginning at (440, 264) with 2×2 binning produces a 256 × 256 image. The corresponding raw transfer contains 1434 × 268 pixels.
The camera’s vertical readout window already accounts for the requested Y position, so the reconstruction mustn’t apply that offset a second time. For 2×2 binning, the ROI coordinates and dimensions must also be even.
These are fairly small details, but they make the difference between a driver that happens to return an image under one set of conditions and one that handles full-frame and subframe acquisition consistently.
Keeping the original image data
While developing the driver, I wanted to retain the data coming directly from the camera. If something looked unusual in a reconstructed image, it was useful to be able to go back to the original acquisition and examine what had actually been received.
OpenStarShoot therefore keeps the raw image data separately from the reconstructed active image.
This also made it sensible to include a FITS exporter. FITS, the Flexible Image Transport System, is widely used in astronomical imaging, and being able to open the output in ordinary astronomy software made it much easier to work with the results.
The camera returns 16-bit pixel counts, which are stored in the FITS image using the standard convention for unsigned 16-bit values:
BITPIX = 16
BSCALE = 1
BZERO  = 32768
The FITS headers record the nominal exposure time, binning and position of the requested region on the sensor. The exporter also checks that the raw data has the expected dimensions before writing the image.
I’ve deliberately kept calibration and image processing separate. OpenStarShoot doesn’t automatically apply dark subtraction, flat-field correction, interpolation or optical orientation adjustments. Those operations are better handled by the software used to process the images, and I wanted the acquisition tools to preserve the camera’s original measurements.
The FITS exporter can also be used independently of KStars or INDI, which makes it handy when experimenting directly with the camera through the command line.
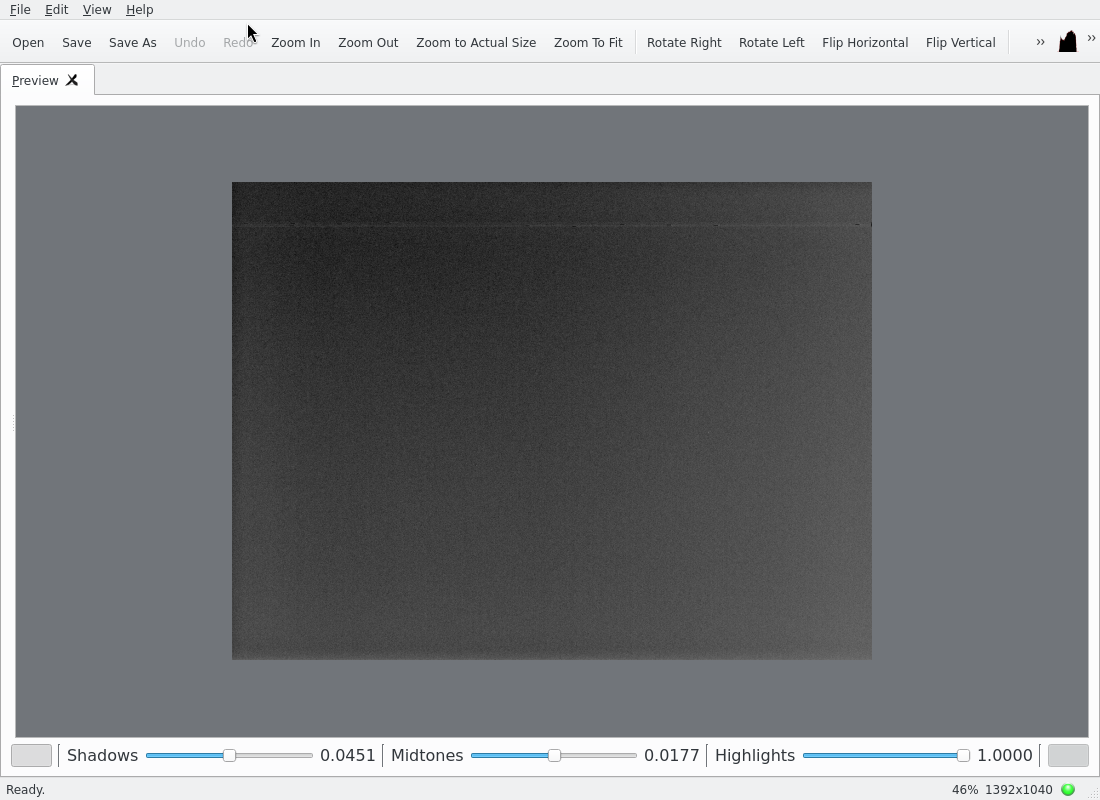
A full-frame image from an earlier physical camera test, displayed in the FITS viewer.
Getting it working with KStars and Ekos
Having a native Linux library that could communicate with the camera was useful, especially while investigating its behaviour, but operating an astronomy camera through diagnostic commands isn’t particularly convenient when you’re trying to take photographs.
I wanted to be able to connect the camera to an ordinary astronomical imaging application, adjust the exposure and binning, select a frame and acquire an image without having to think about USB commands every time.
That’s where INDI came in.
INDI stands for Instrument Neutral Distributed Interface. It’s an open-source framework that allows astronomical software to control equipment such as cameras, telescope mounts and focusers through a common interface. KStars/Ekos already understands how to work with an INDI CCD driver, so I could concentrate on translating those standard controls into the commands required by the Orion.
I kept the native C library independent of INDI, allowing it to handle the camera’s USB communication, exposure control, image acquisition and reconstruction. The INDI adapter then uses that library to provide the camera functions expected by Ekos.
I rather like this arrangement because it means the underlying camera driver isn’t tied to one particular application. The diagnostic utilities can operate the camera directly, while INDI provides a more convenient interface for normal imaging.
Development and physical testing took place on Debian 13. I’ve been able to acquire full-frame images at both 1×1 and 2×2 binning, along with centred and offset unbinned subframes, and use the camera through KStars/Ekos.
Combined 2×2 subframes have also worked through the native camera interface, and the corresponding INDI functionality has passed tests using synthetic data. I haven’t separately tested that particular combination through a physical Ekos session.
The original camera also has cooling and fan controls, which I was able to identify in the recovered protocol. I’ve implemented paired cooler on/off and fan high/low commands in the native library, and the command encoding and responses have passed offline testing. I haven’t yet physically checked what those commands do to the camera’s cooling system, however, so temperature regulation and INDI cooling controls aren’t included at this stage.
There are a few other aspects that remain uncalibrated or unverified, including precision exposure timing and how the camera recovers following interrupted acquisitions. I’ve documented those in the repository so anyone using or extending the driver knows what has actually been tested.
I’m quite pleased with where the INDI integration has ended up. I can connect the camera, choose an exposure, set the frame and binning, and acquire images through Ekos using the normal camera interface.
For an instrument whose original software was written for Windows XP-era systems, that’s a very useful result.
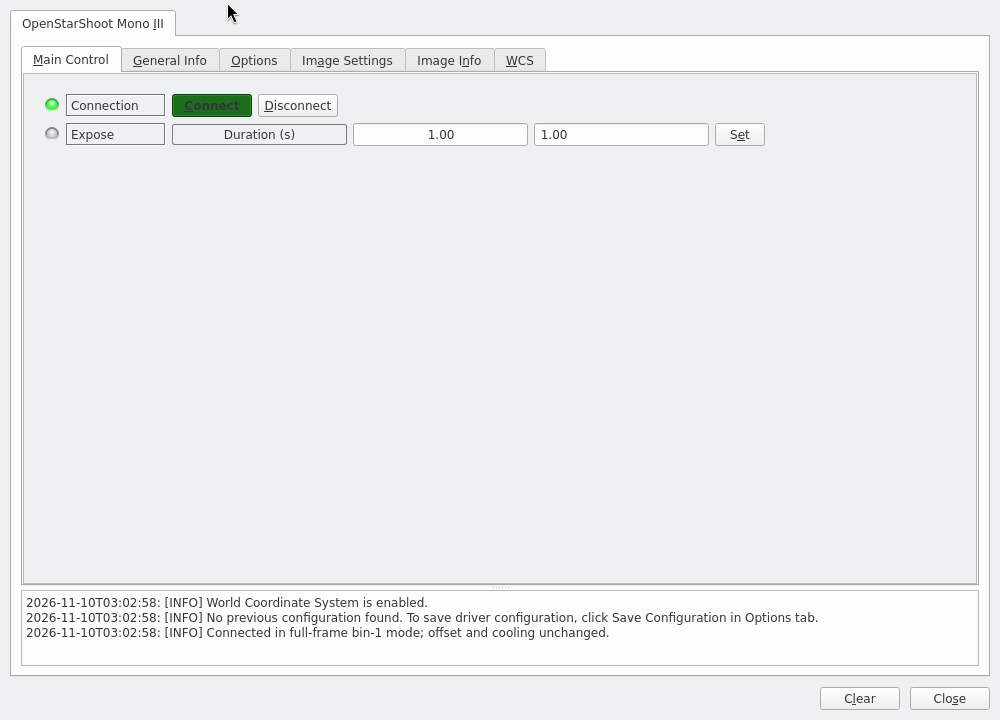
OpenStarShoot connected through INDI.
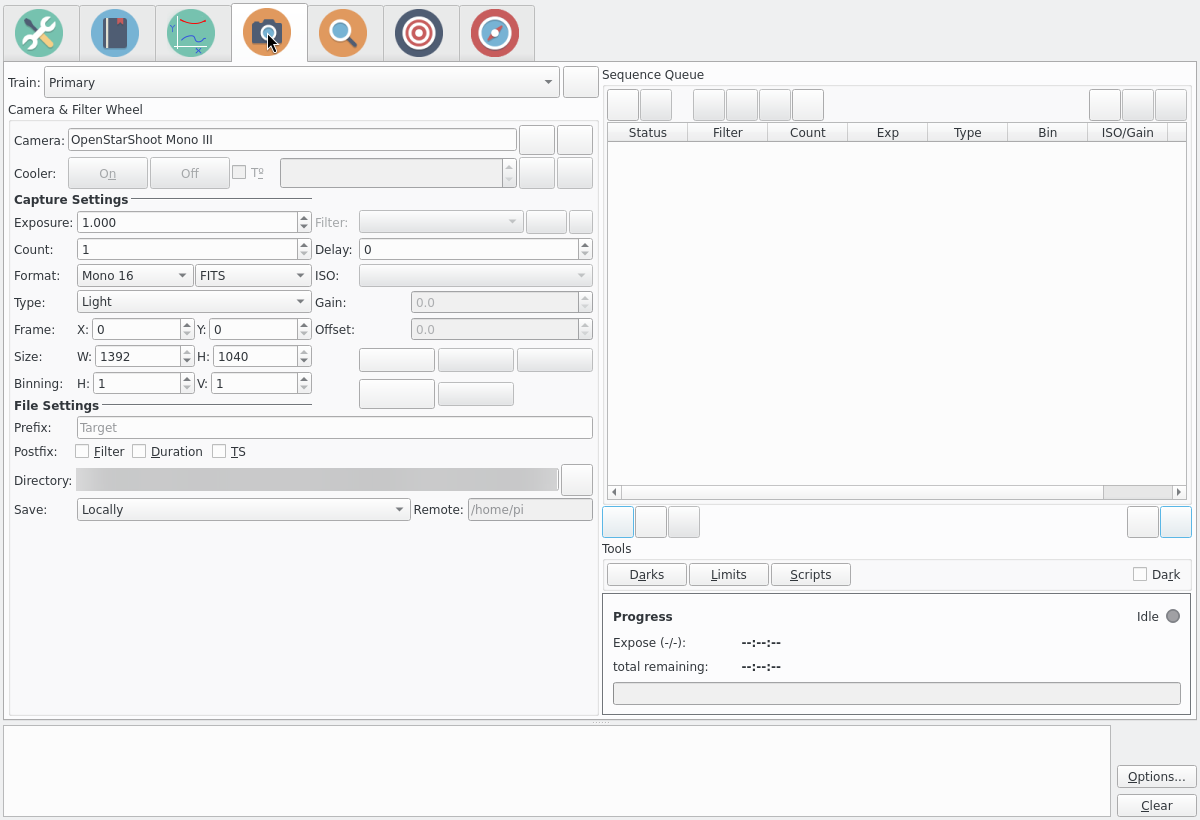
OpenStarShoot in the Ekos Capture module.
Releasing OpenStarShoot
With the native driver, FITS exporter and INDI integration working, I decided to release the project publicly. I’ve called it OpenStarShoot, and the first release, v0.1.0, is now available under the MIT licence.
The repository contains the source for the C camera-control library, diagnostic command-line utilities, FITS exporter and optional INDI adapter. I’ve also included the build system, offline regression tests, installation instructions and documentation covering the recovered USB protocol, camera commands and image reconstruction.
At present, the driver specifically supports the Orion StarShoot Deep Space Monochrome Imager III (#52076). Orion used the StarShoot name for several different cameras, and there’s no guarantee that those other models use the same USB controller or protocol. I’d rather be clear about the model I’ve actually investigated.
The source has been built and tested on Debian 13. If you’re using another Linux distribution, you’ll need the appropriate development libraries and build dependencies. I haven’t made precompiled packages at this stage, but the README explains how to build and install the native tools and INDI driver.
You can find everything here:
The v0.1.0 release is available to download, and I’ve put the technical details in the protocol and image reconstruction documentation for anyone interested in how it works.
This has been an enjoyable project to work through. I’d used dedicated astronomical cameras for years without ever having much reason to investigate the communication between a camera and its controlling software. Going back through the original Windows binaries, recovering the commands and figuring out how the CCD’s raw output is arranged gave me a much better appreciation of what the camera driver is actually responsible for.
And I should thank Renato again, both for giving me the camera and for having the foresight to keep the original drivers. They turned out to be rather useful!
If you happen to have one of these Orion cameras, I’d be interested to hear from you. OpenStarShoot has been developed and tested with my one example, so feedback from anyone running it on another unit would be particularly welcome. The source is on GitHub, along with the installation instructions and everything I’ve documented about the camera so far.